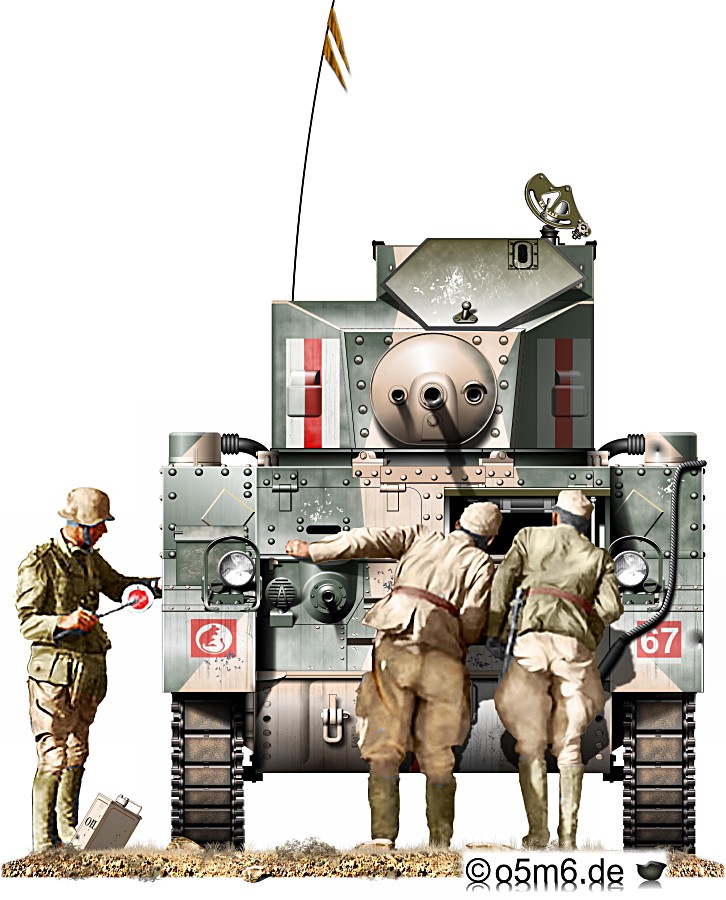
Content
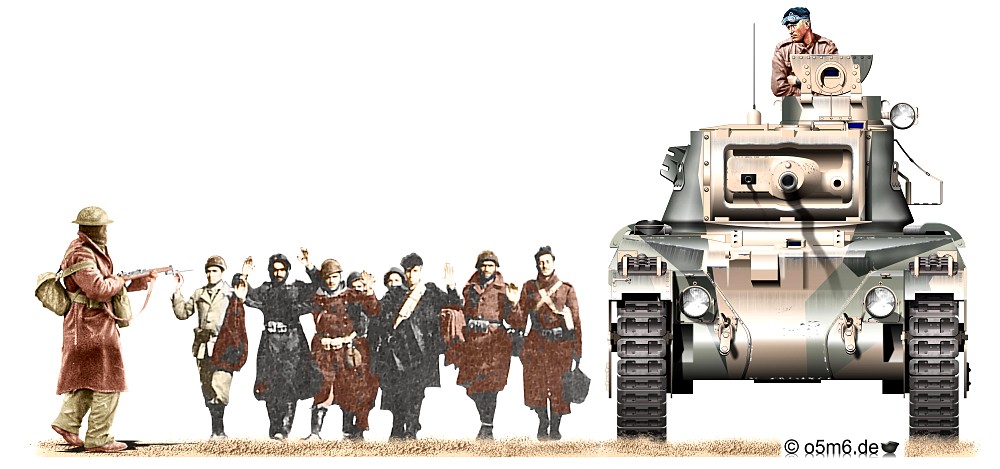

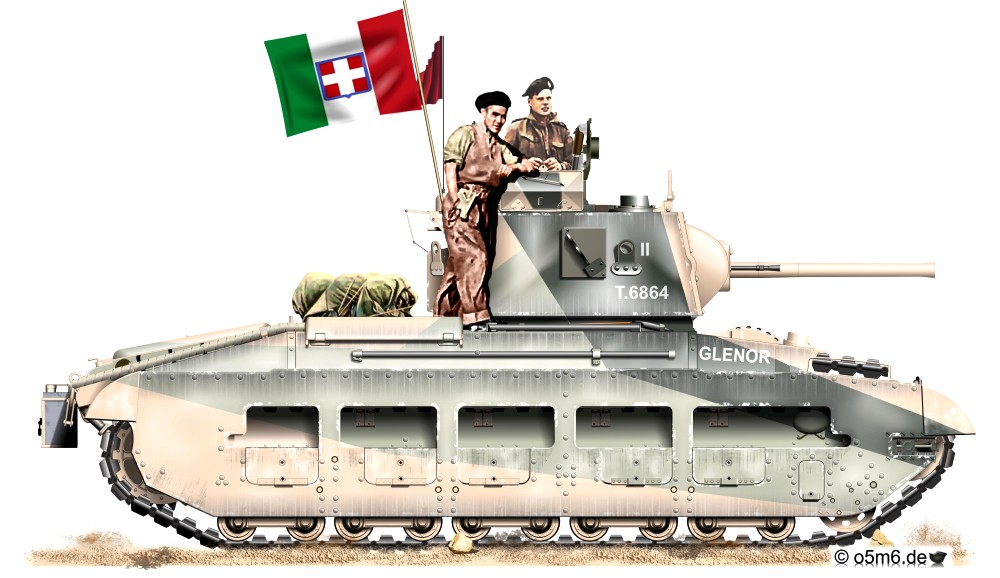
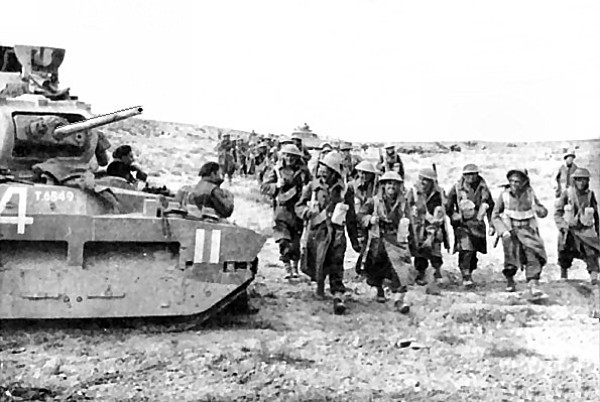
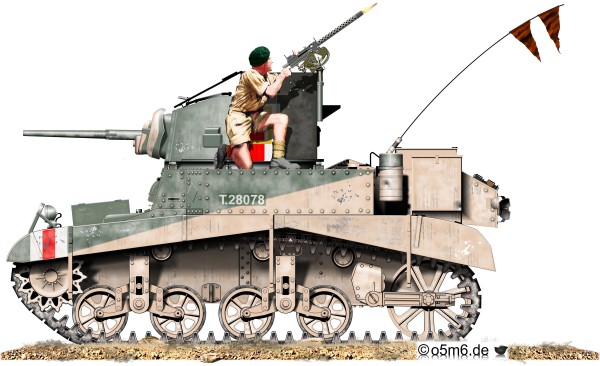
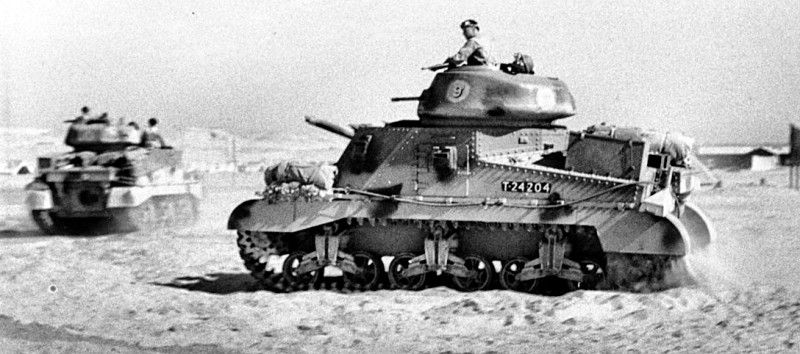
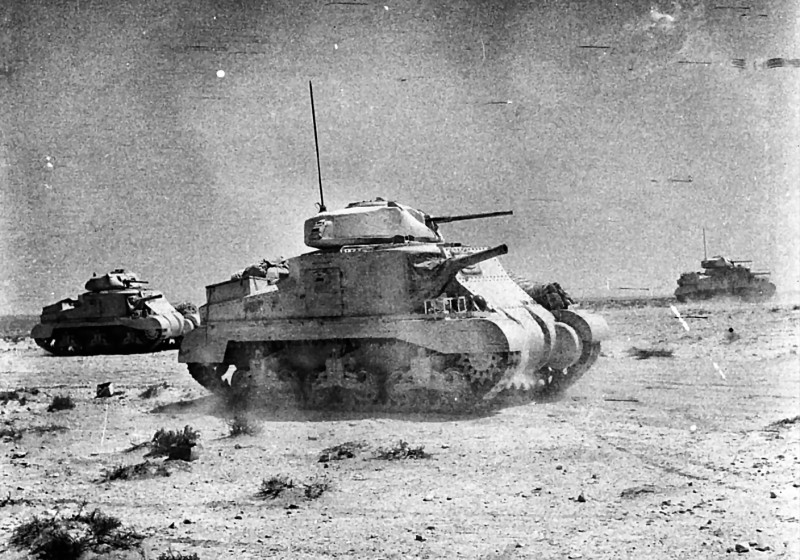
on its way into Tobruk, displaying a captured Italian flag, 24 January 1941


[Not sure, though, if it's the same "White 2" of the Tobruk Relief Meeting shown above]
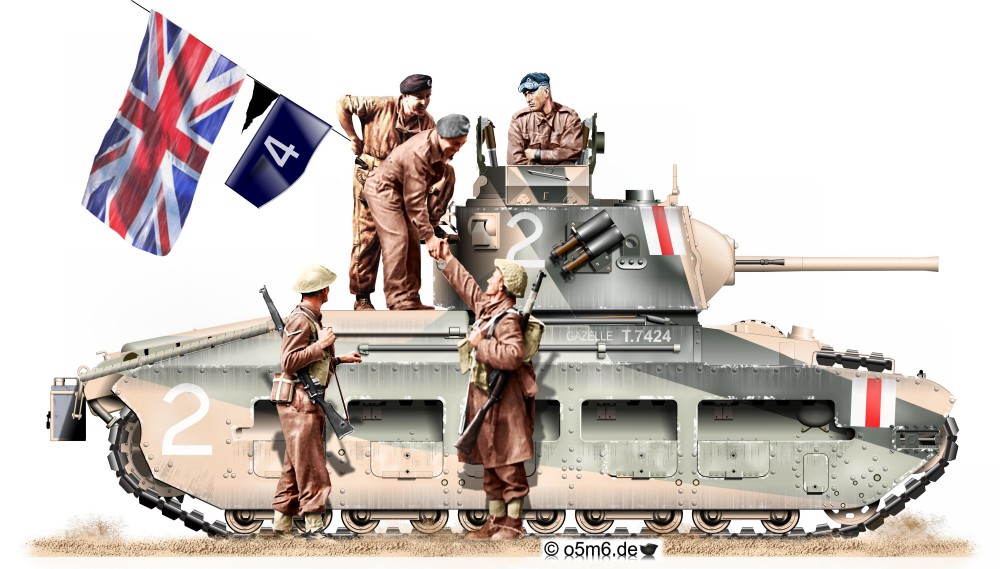
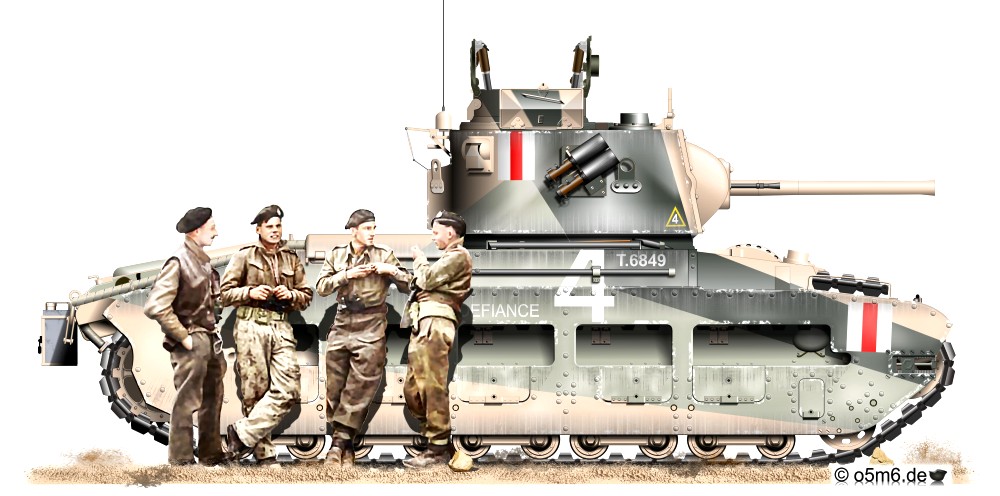
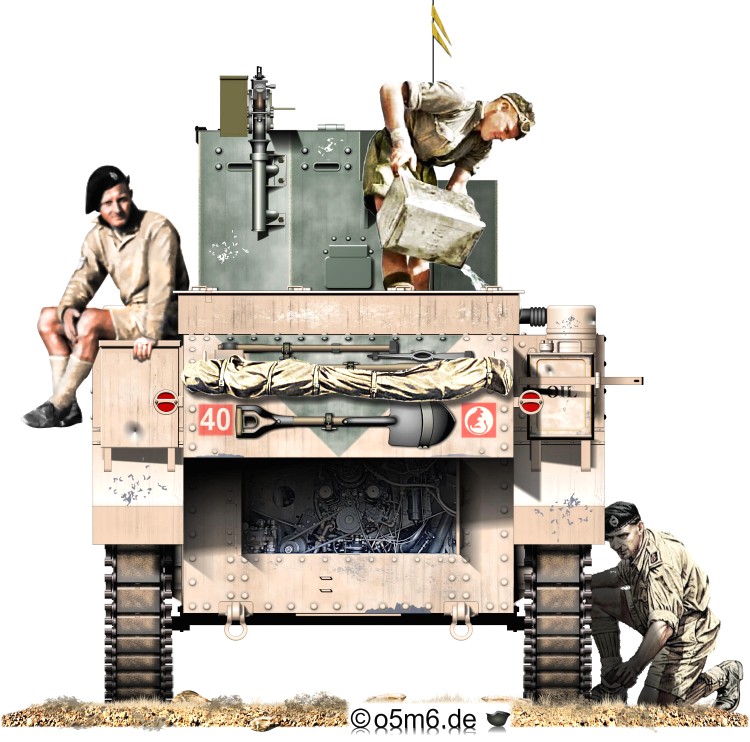
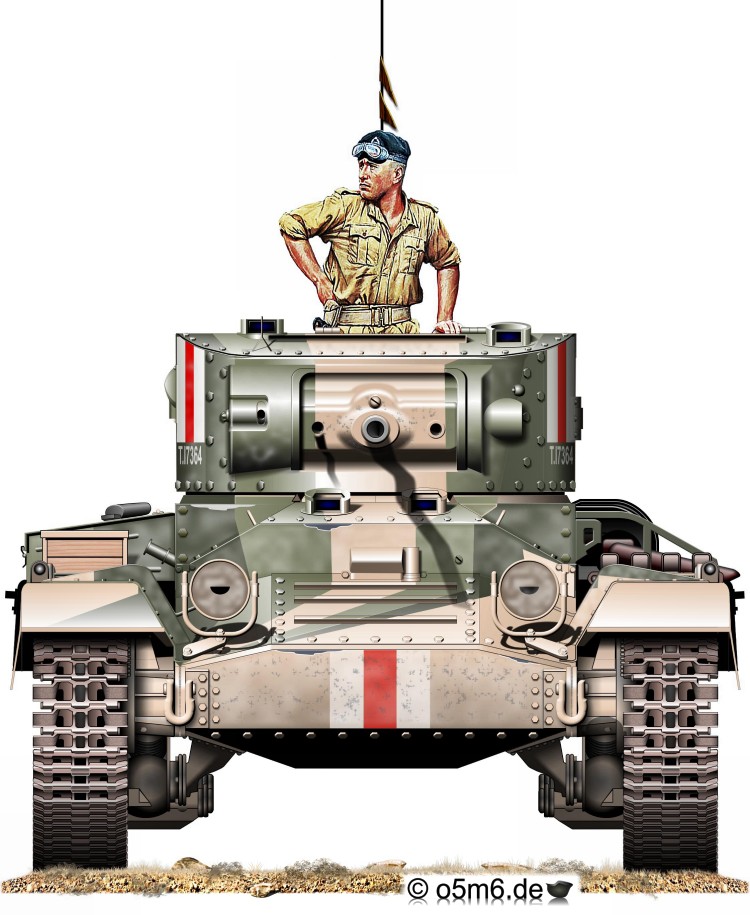
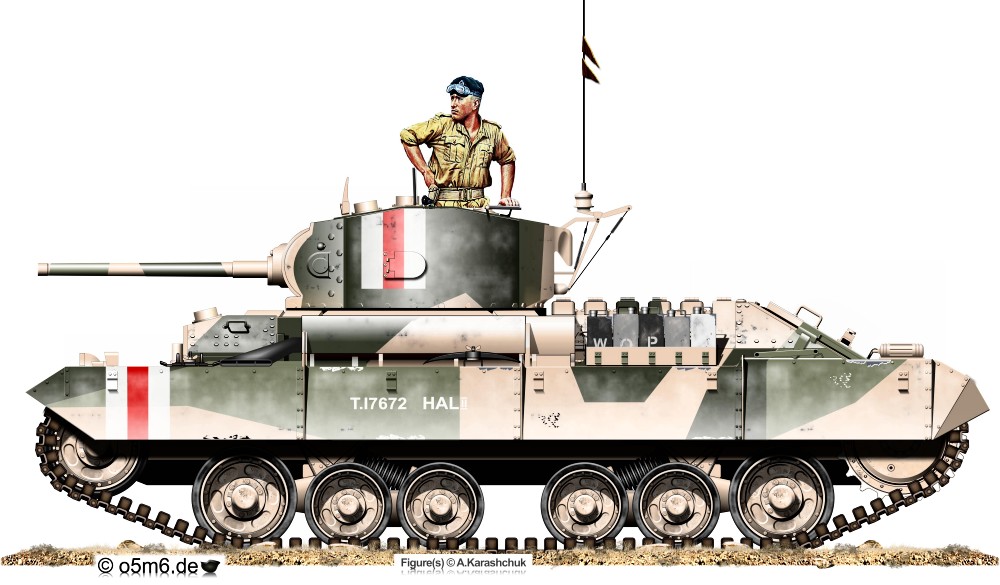
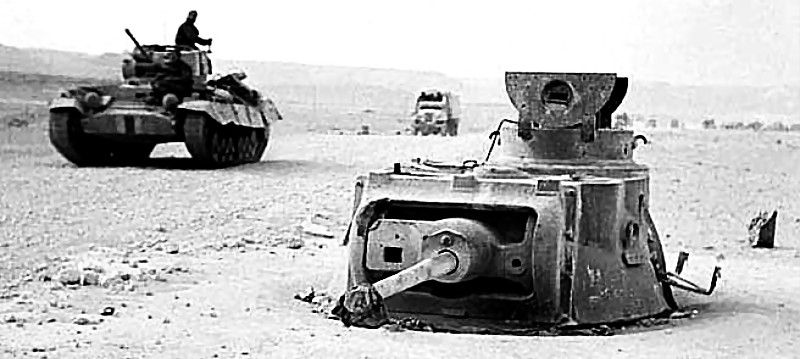
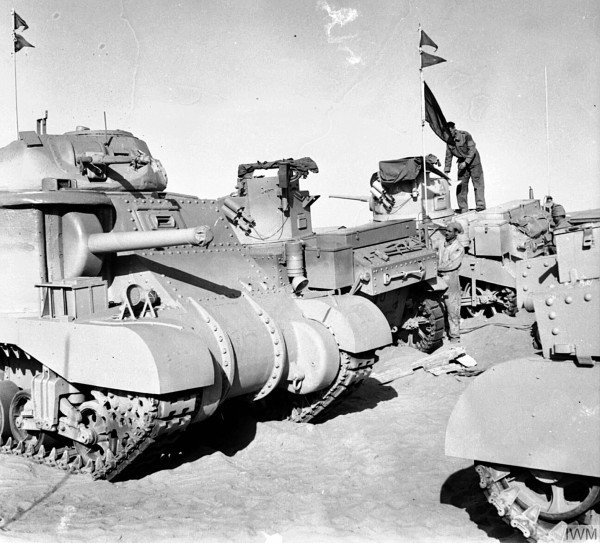
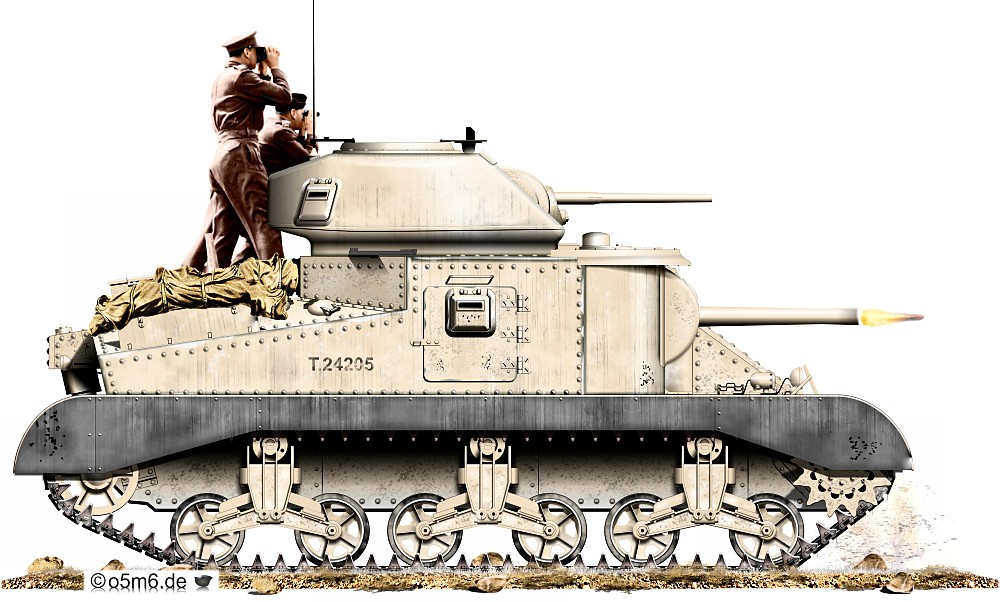
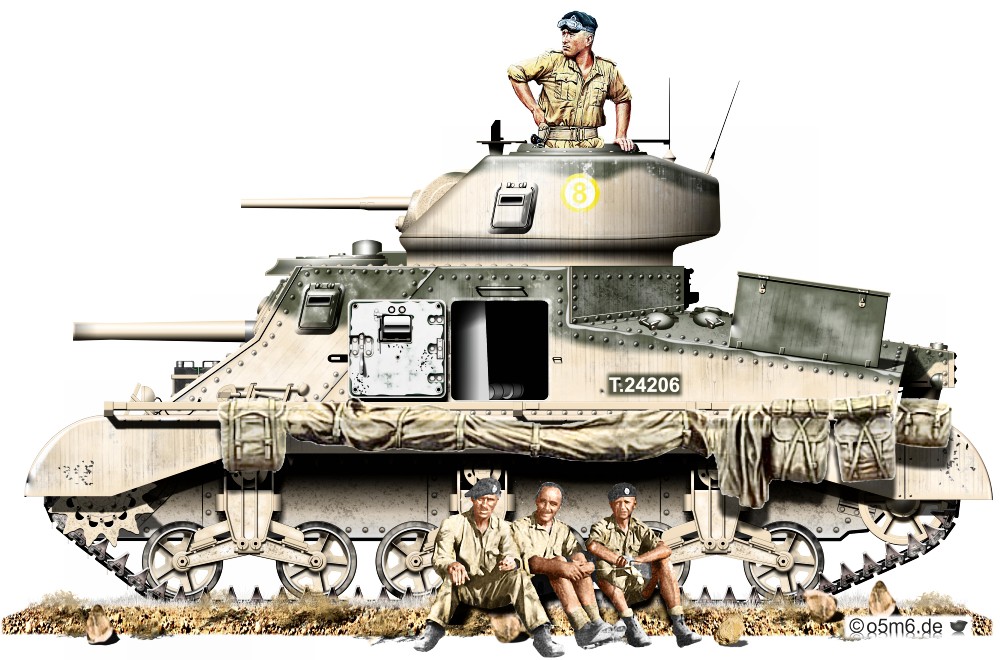
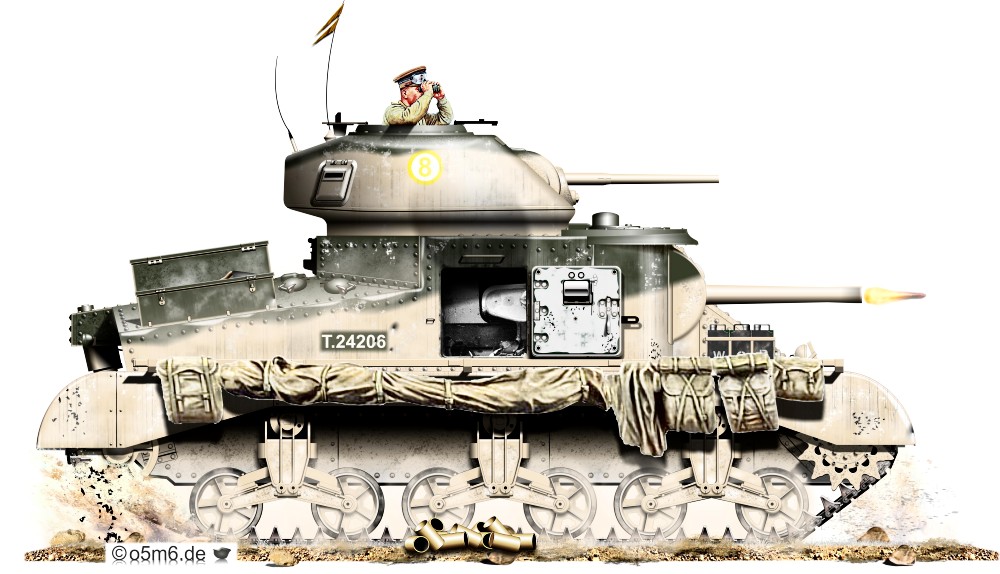
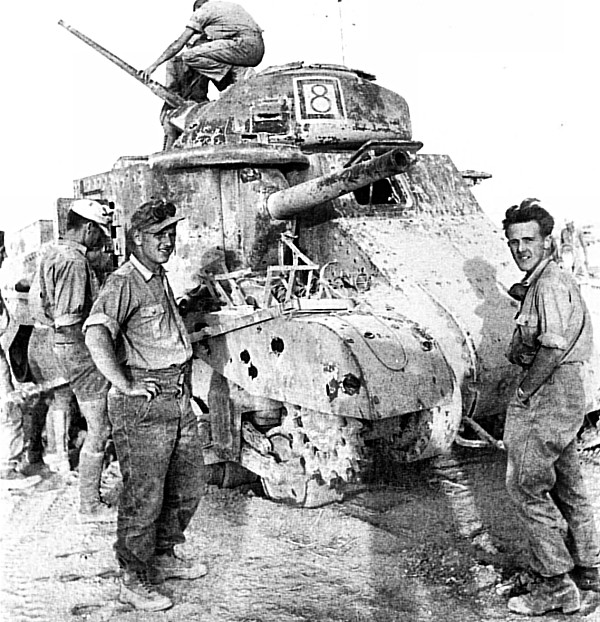
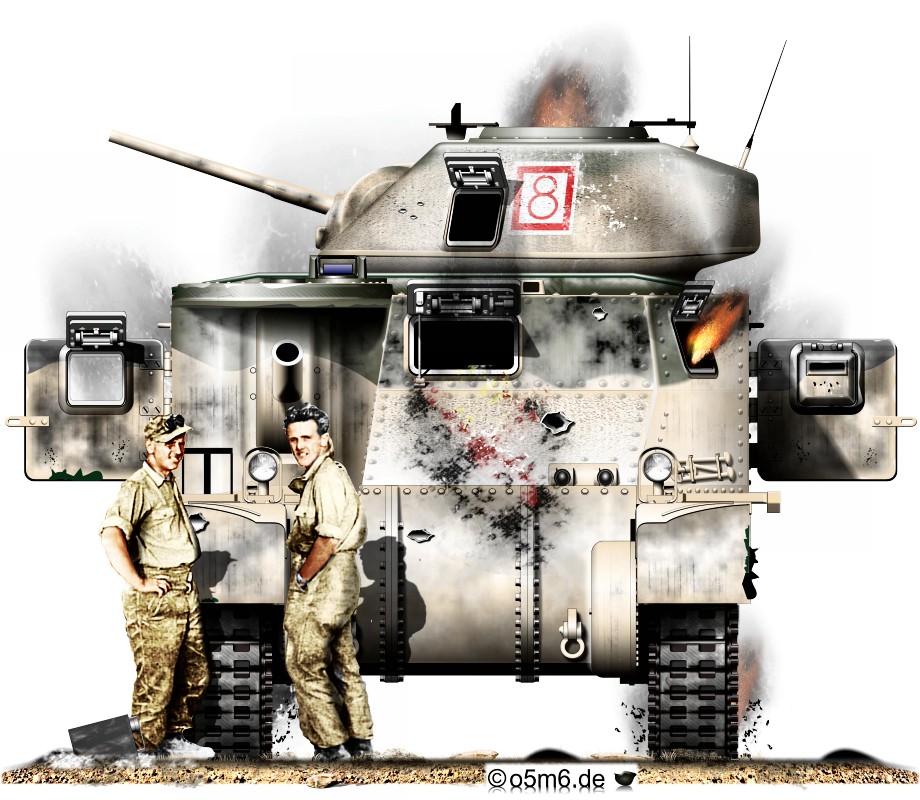
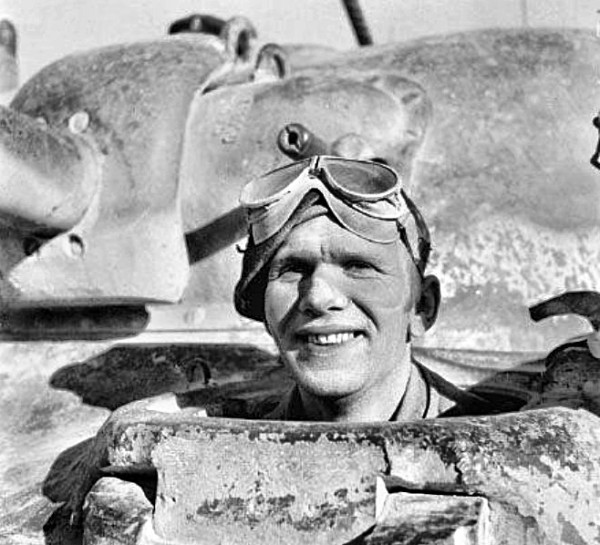
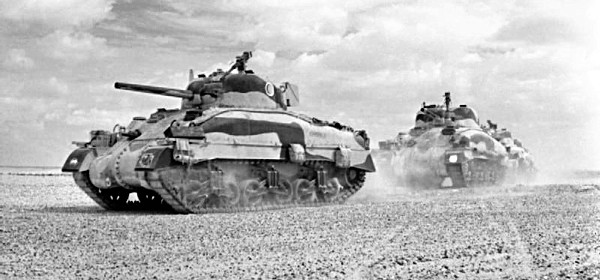
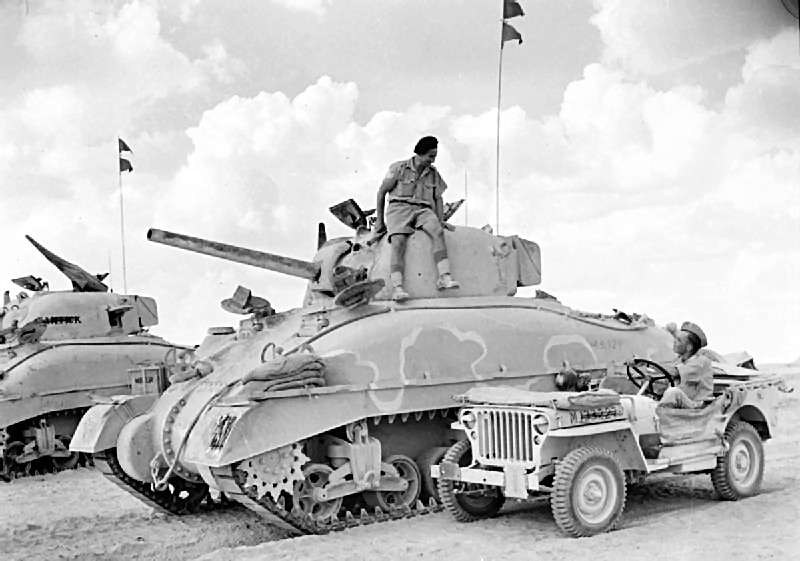
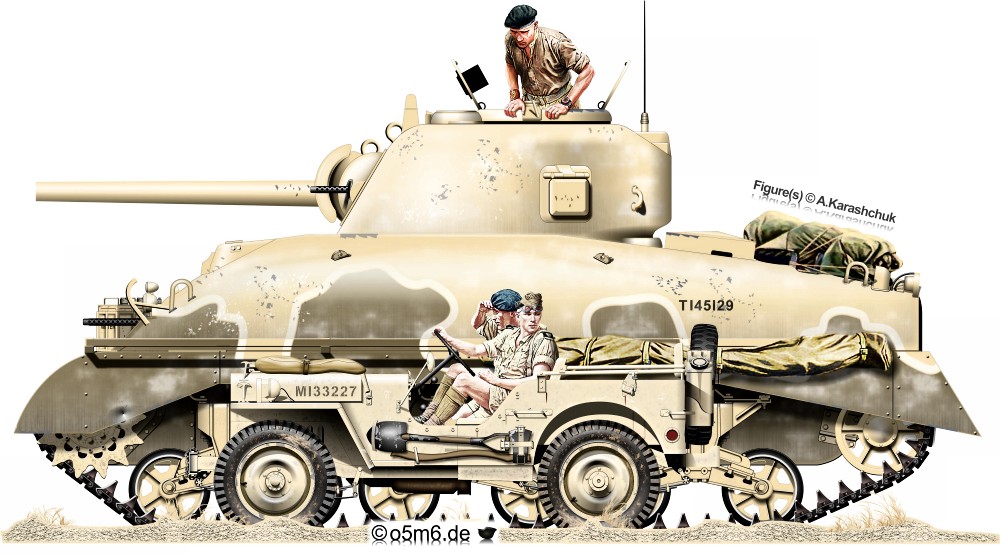
4th Armoured Brigade, 7th Armoured Division, during Operation "Crusader", Nov 1941
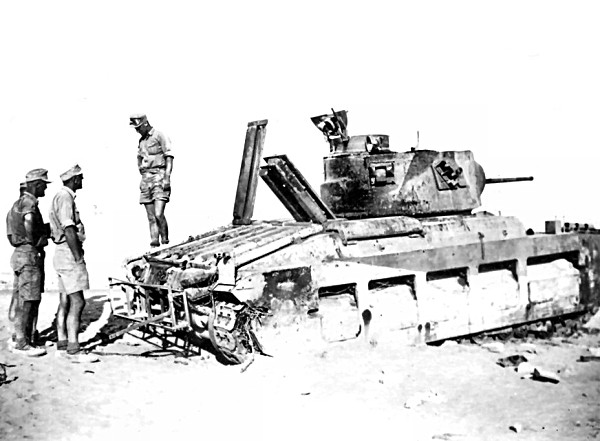
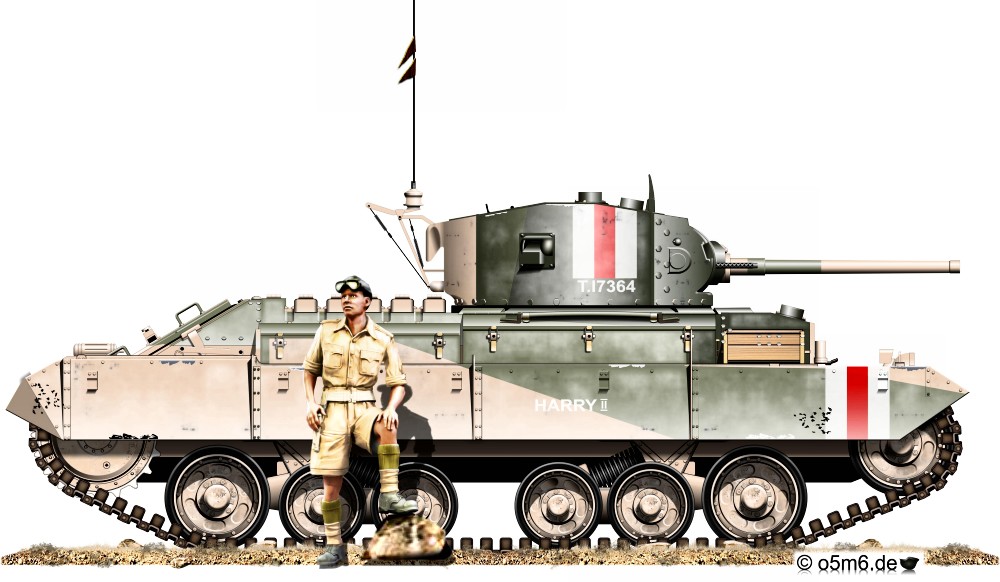
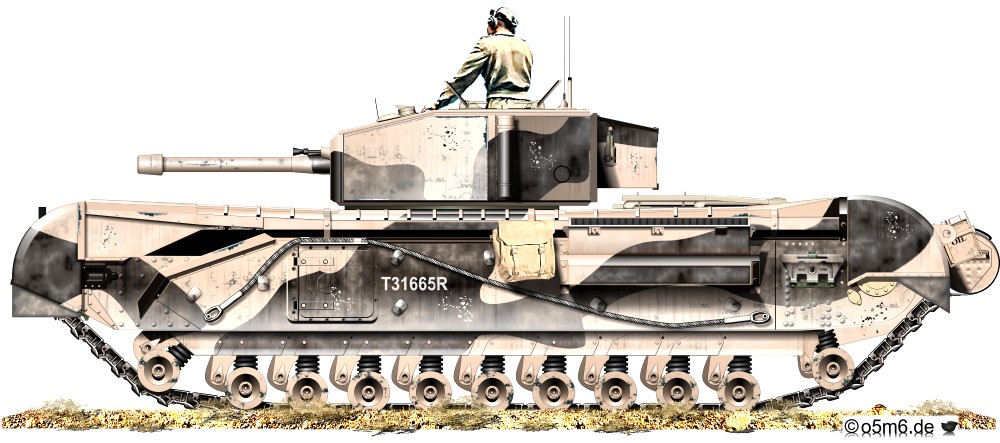
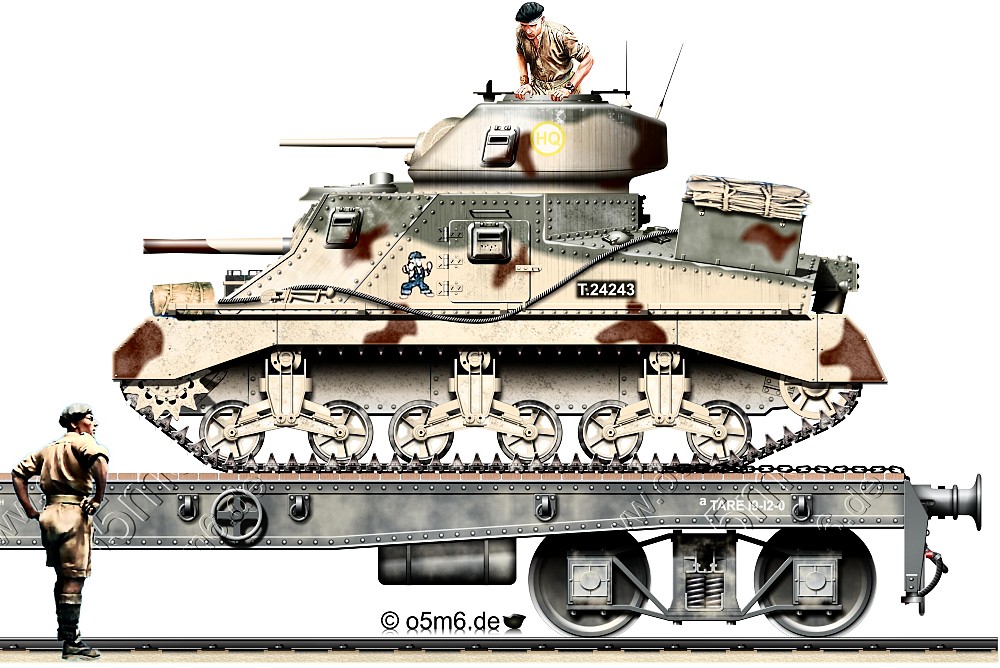
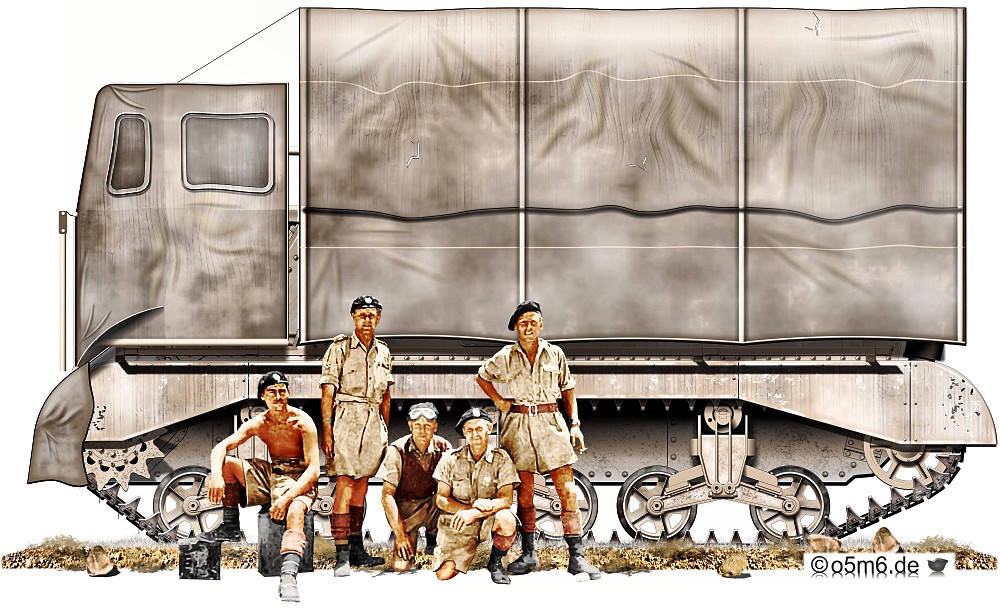
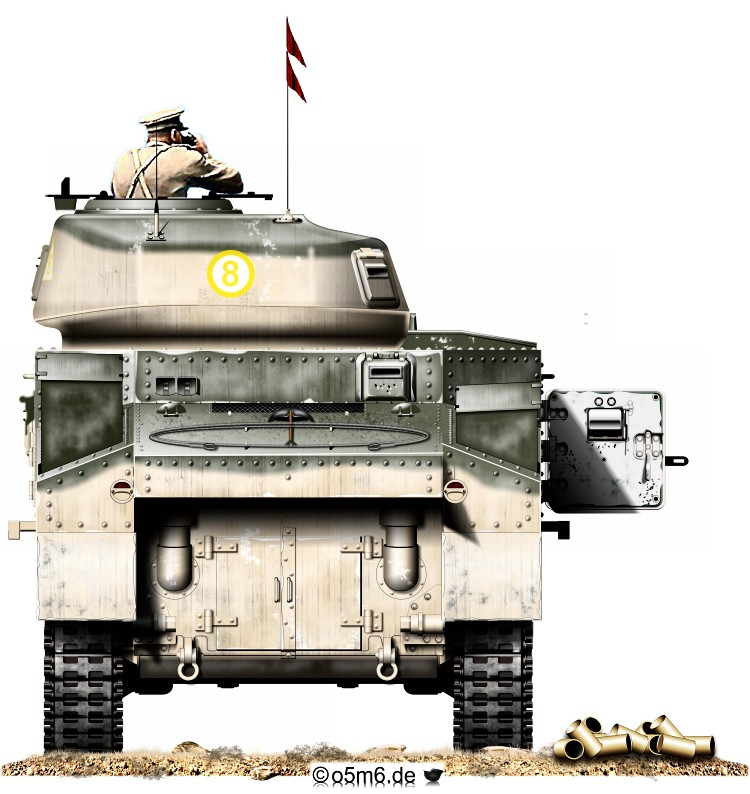
[Source : Fletcher/Zaloga, "British Battle Tanks", Osprey 2018]
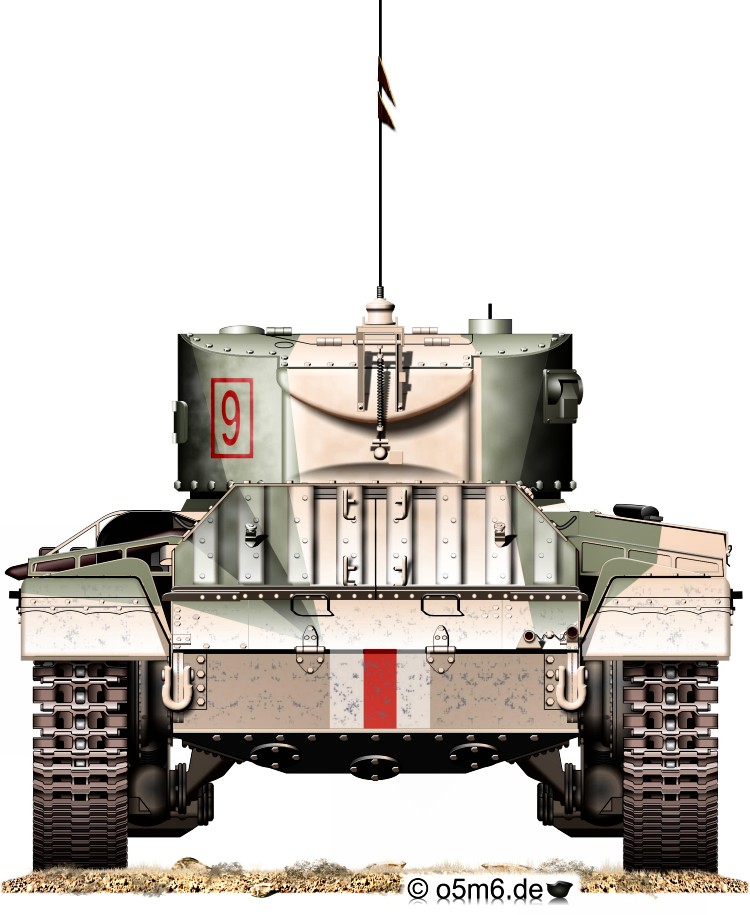
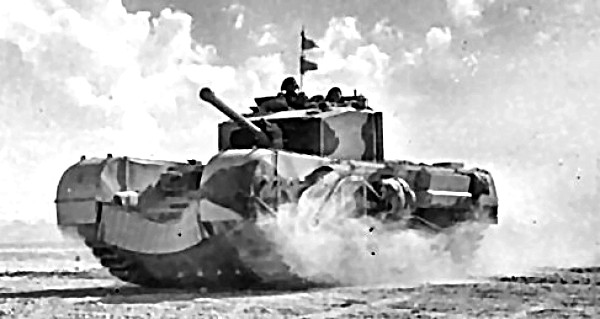
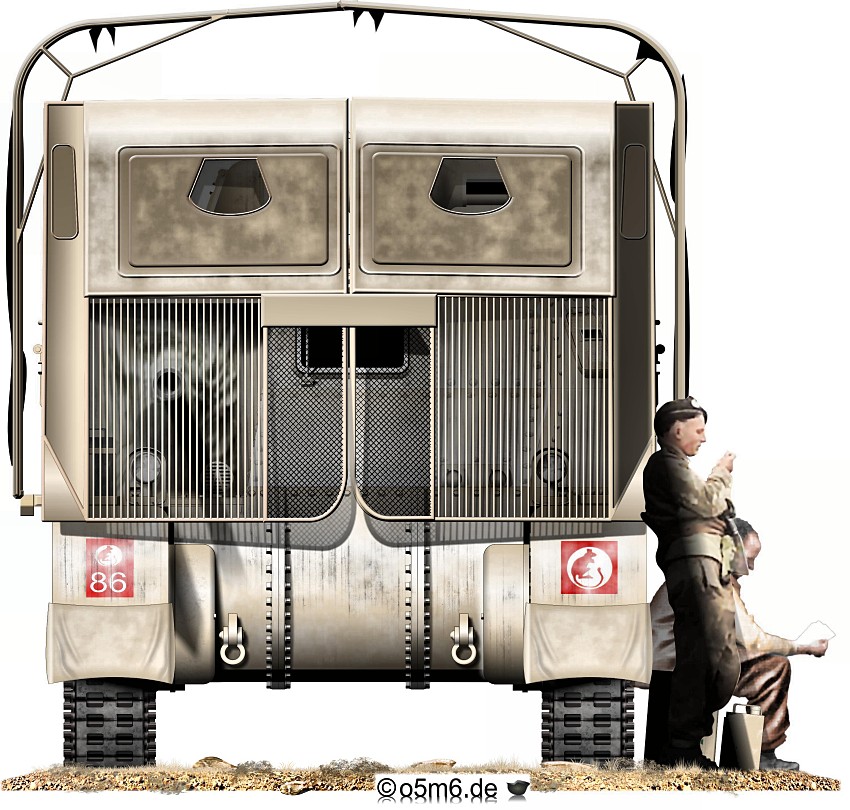
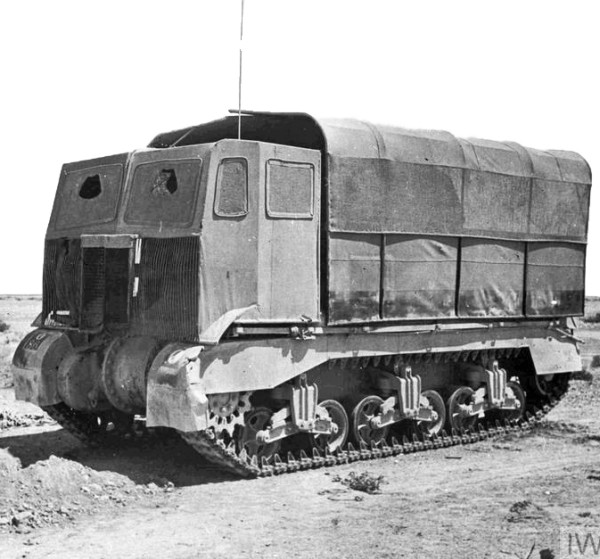
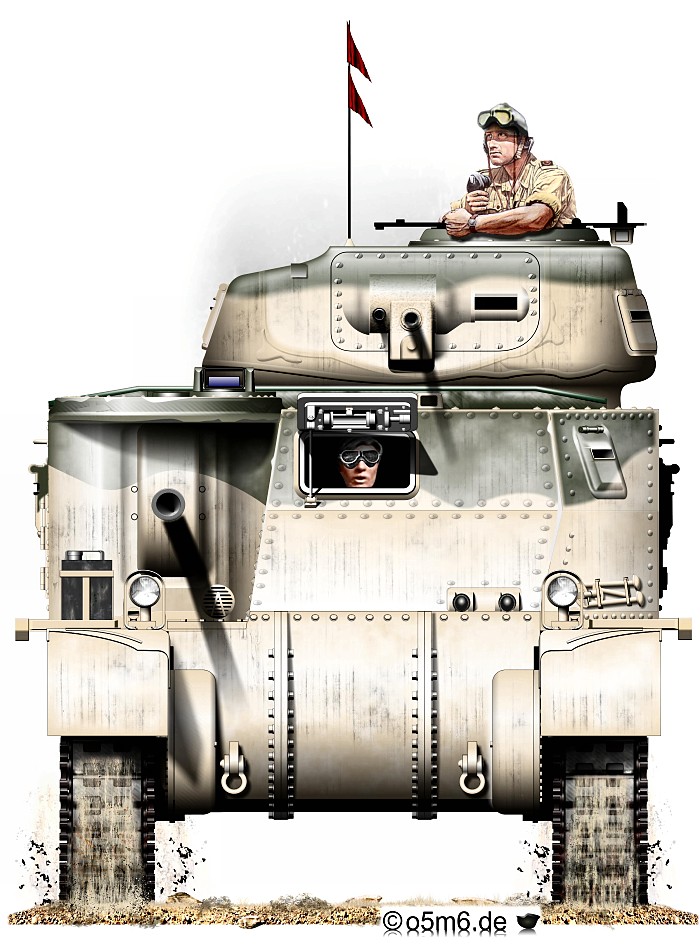
[Source : Fletcher/Zaloga, "British Battle Tanks", Osprey 2018]
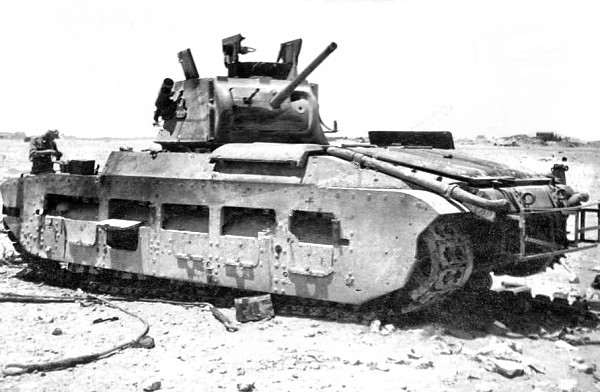
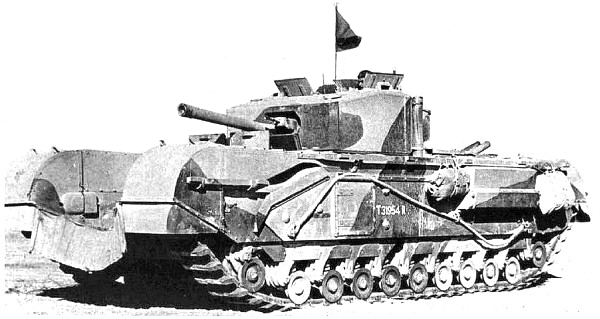
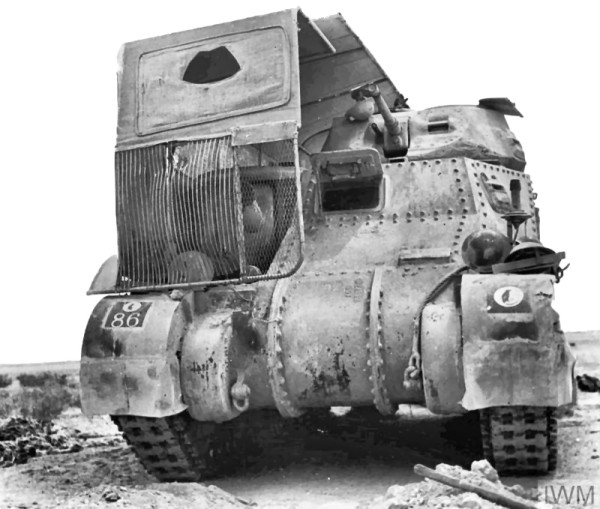
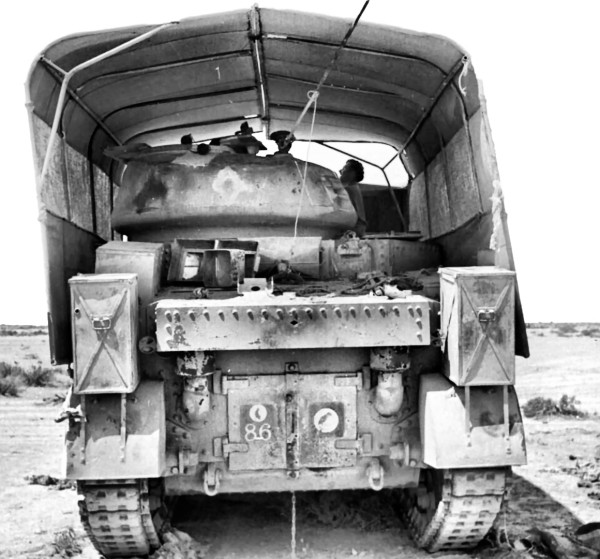
[Source : Fletcher/Zaloga, "British Battle Tanks", Osprey 2018]

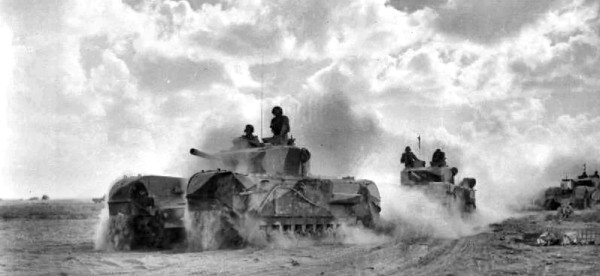
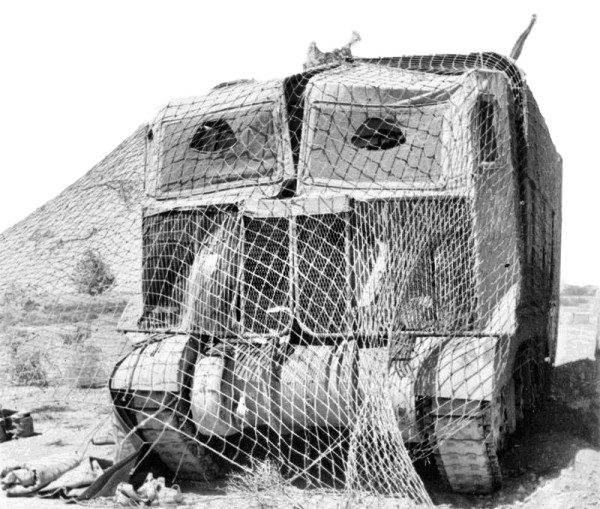
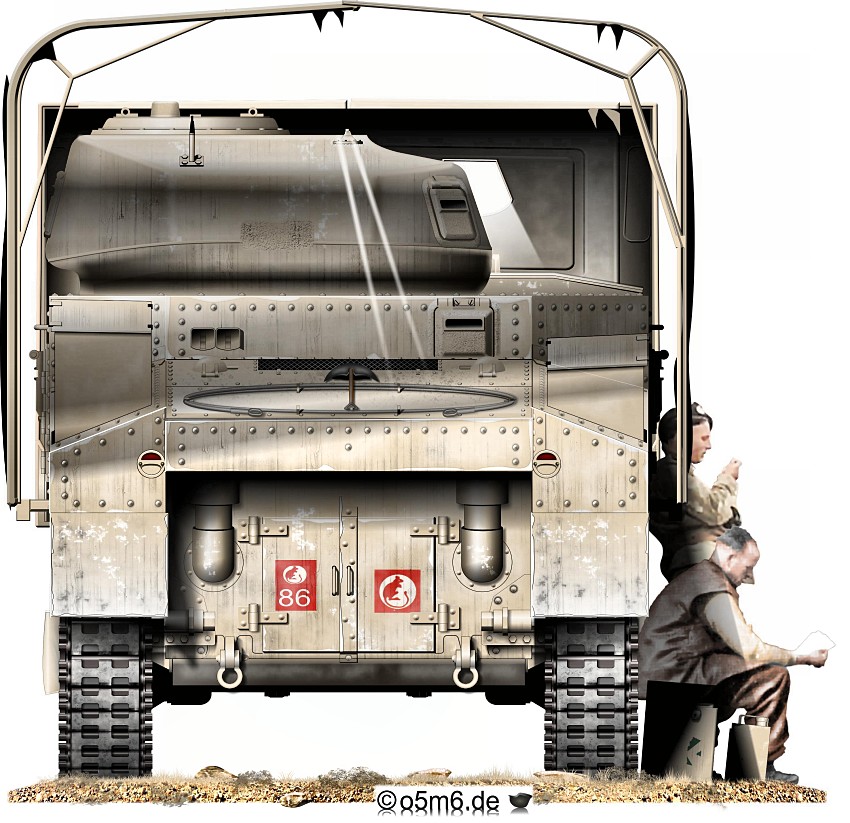
[Source : Fletcher/Zaloga, "British Battle Tanks", Osprey 2018]
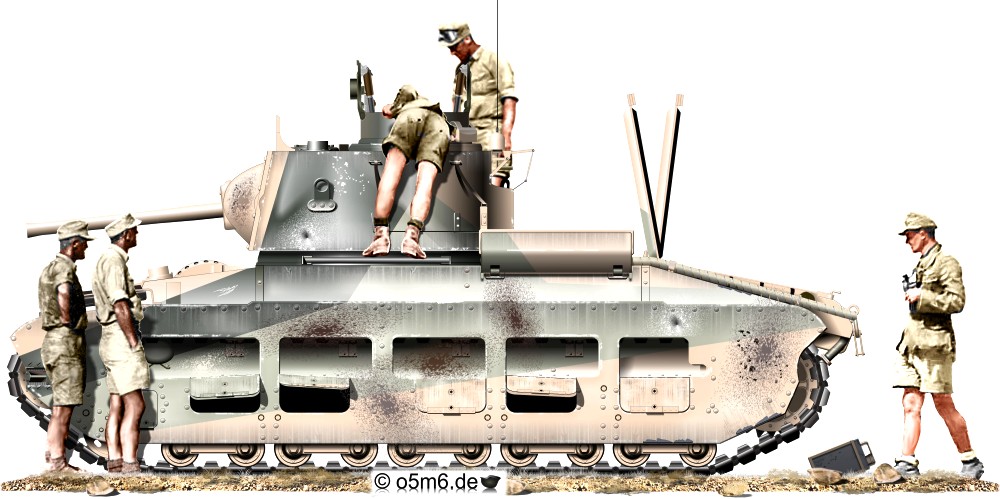
[Source : Fletcher/Zaloga, "British Battle Tanks", Osprey 2018]
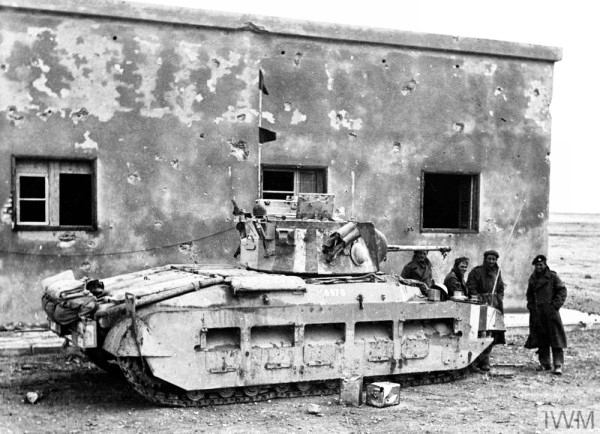
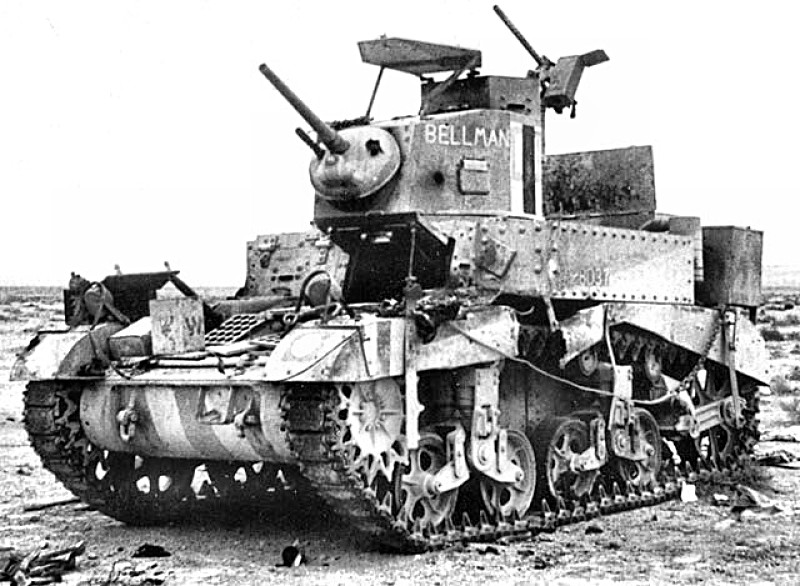
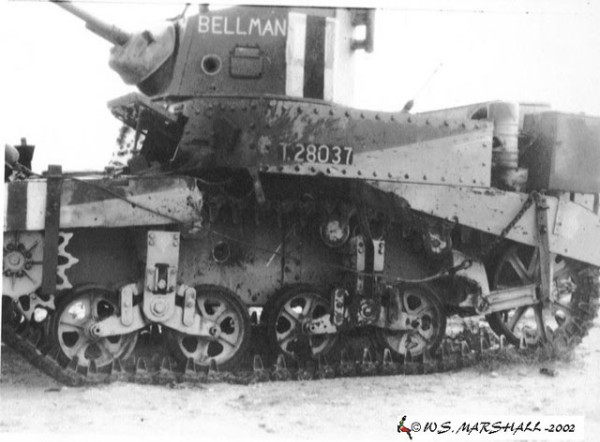
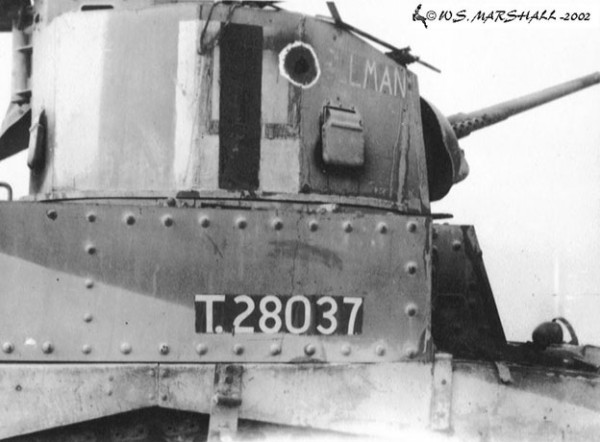
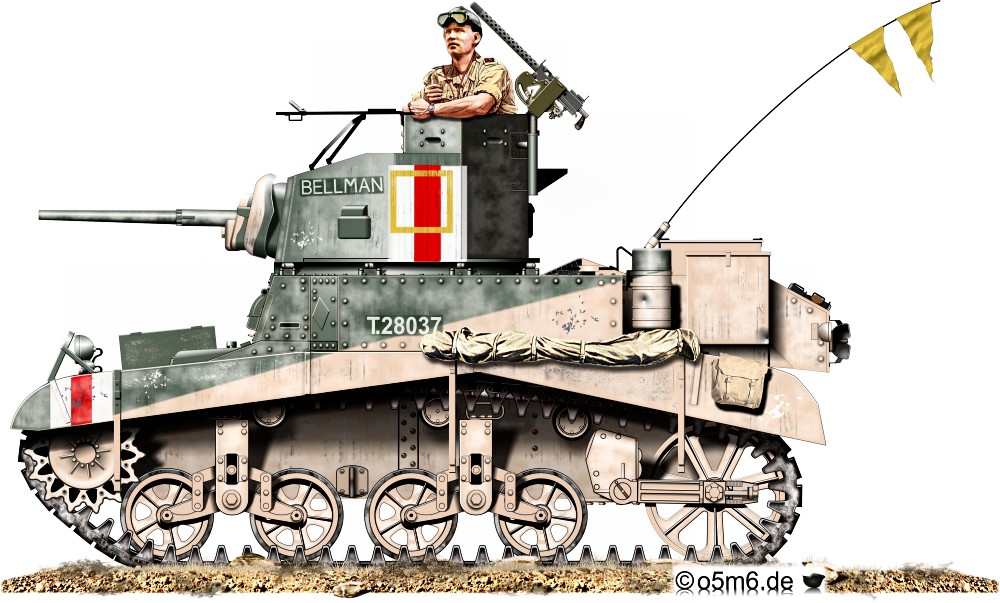
Don't miss the awesome in-depth documentation "BELLMAN - The story of a Stuart" by William Marshall at http://www.clubhyper.com/reference/bellmanwm_1.htm
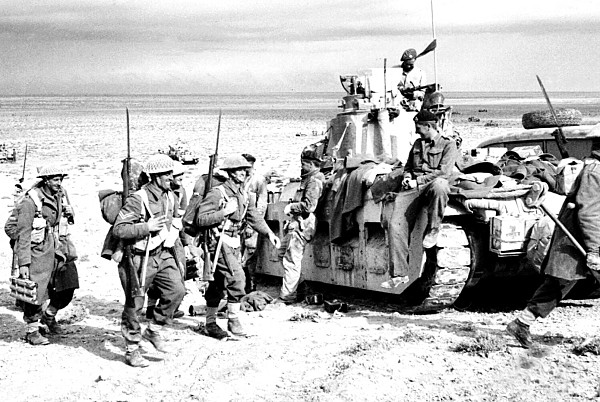
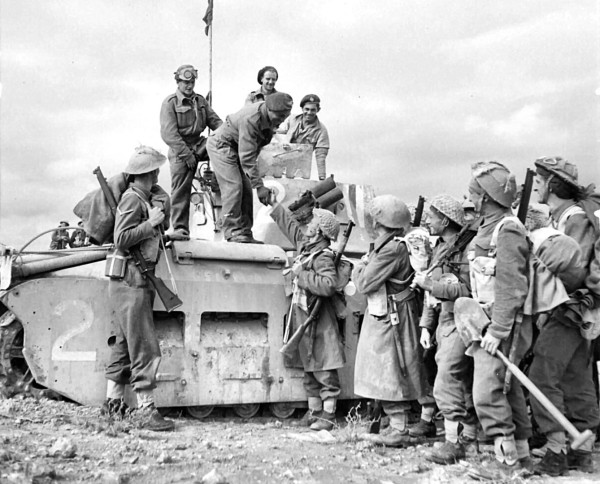
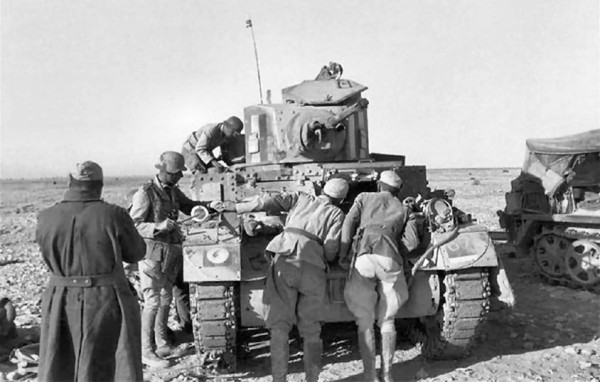
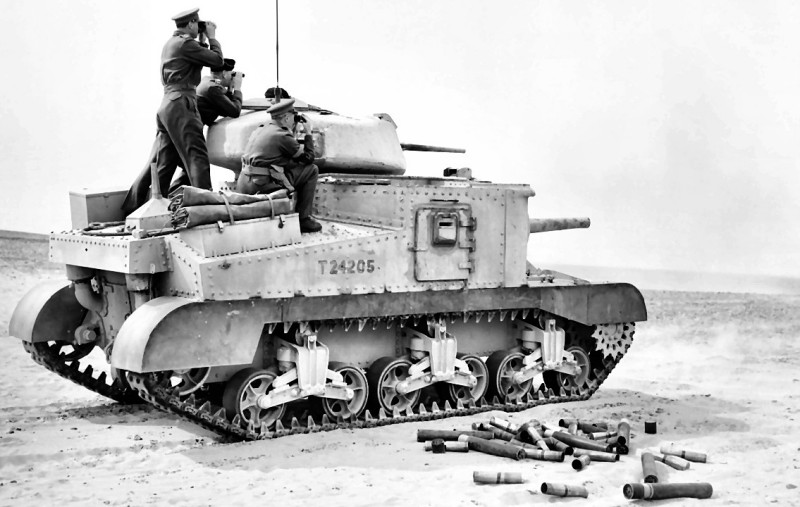
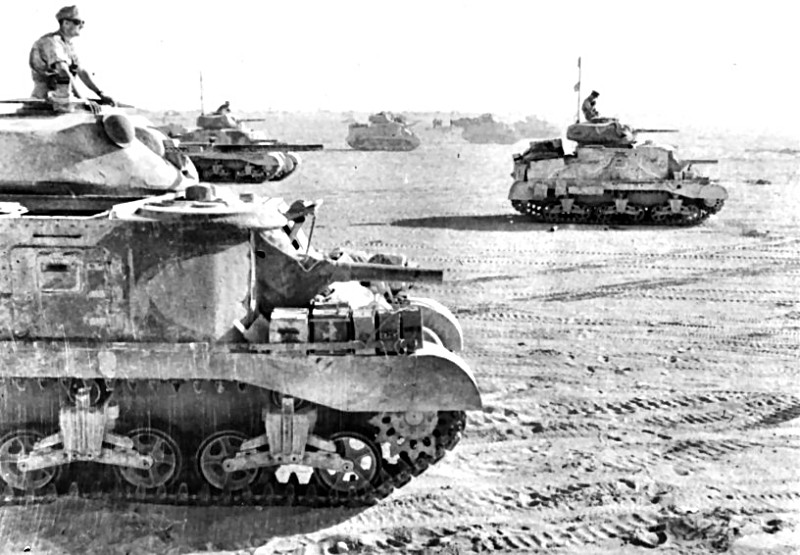
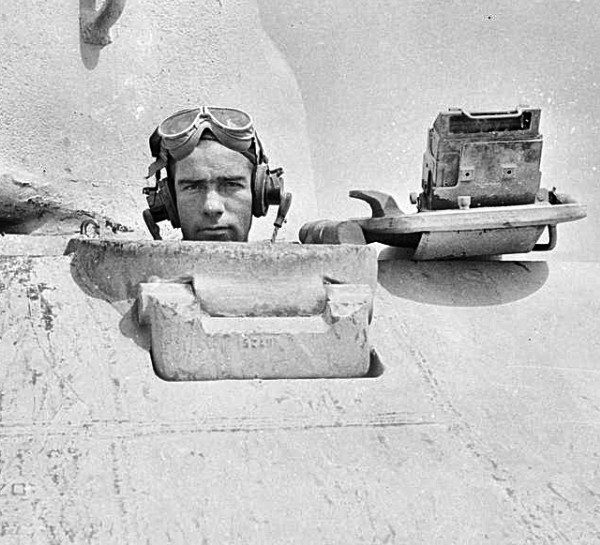
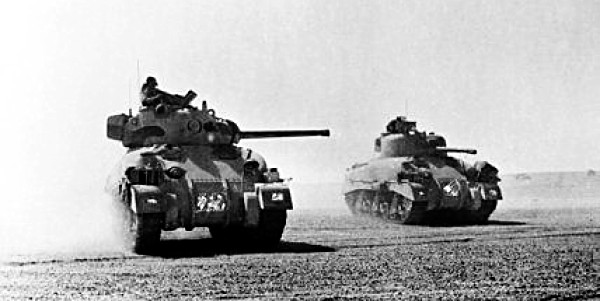
4th Armoured Brigade, 7th Armoured Division, during Operation "Crusader", Nov 1941
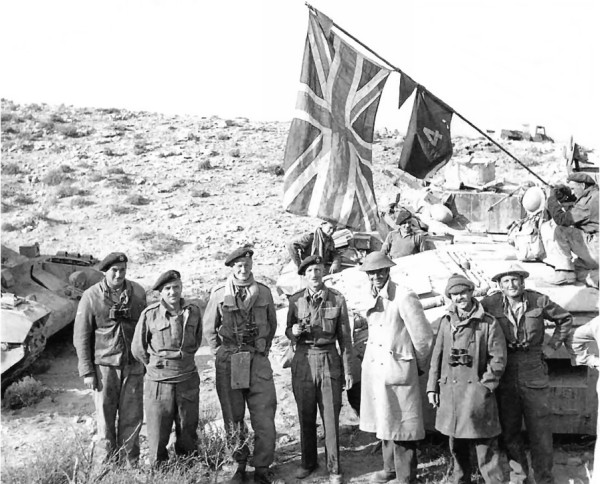
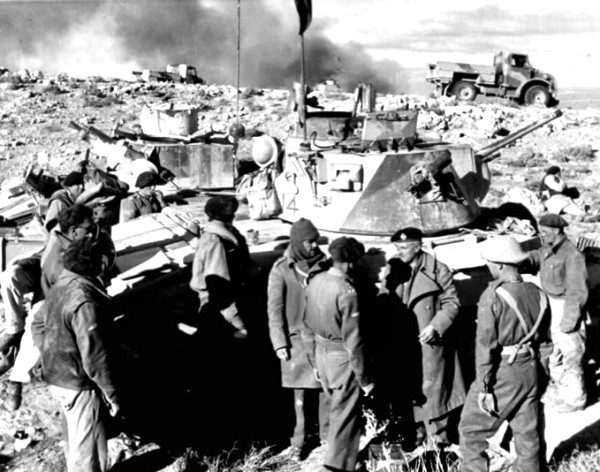
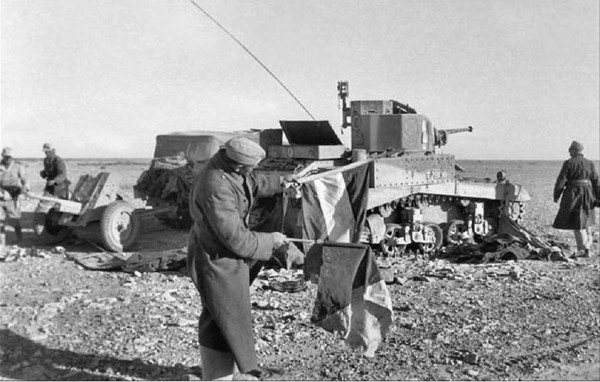
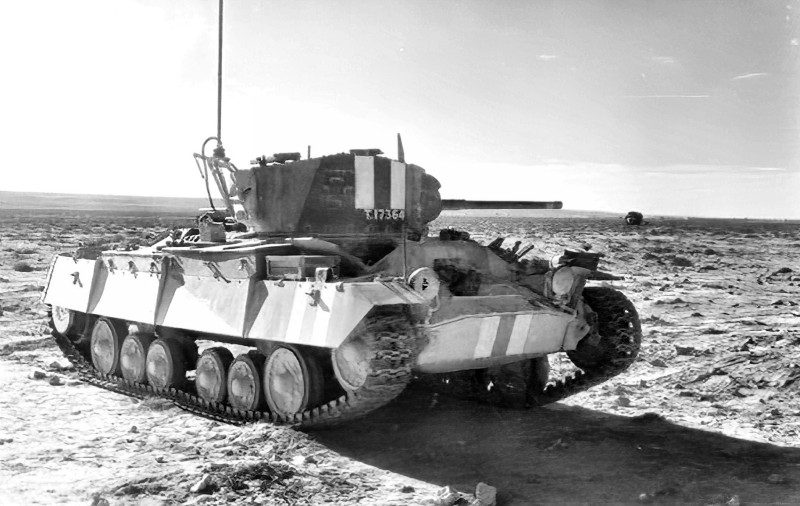
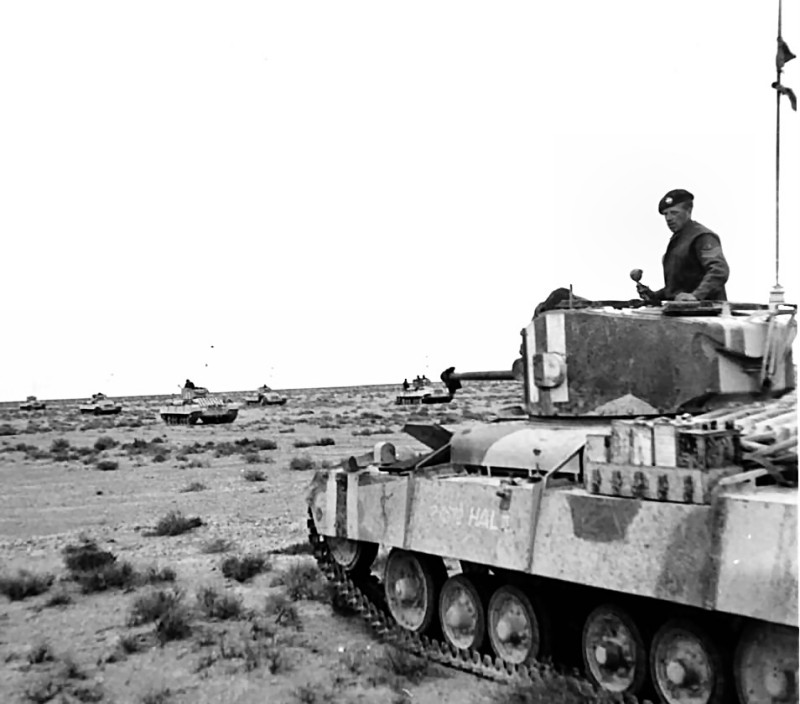
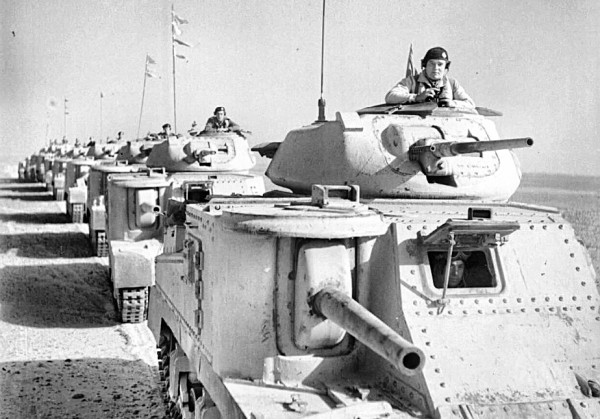
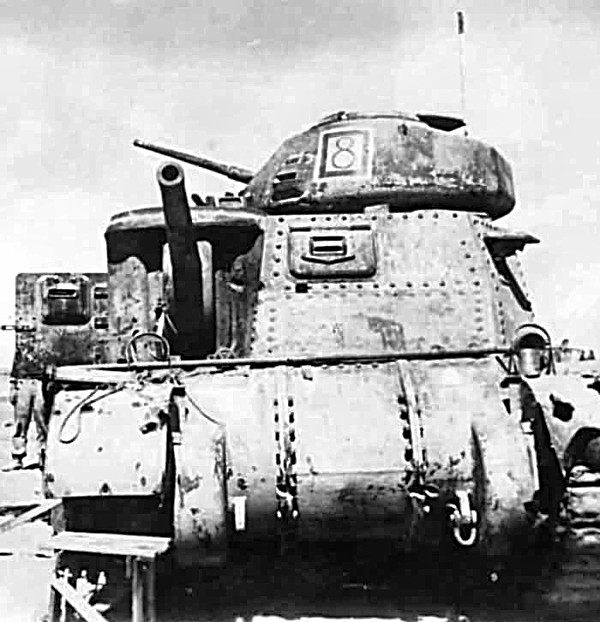
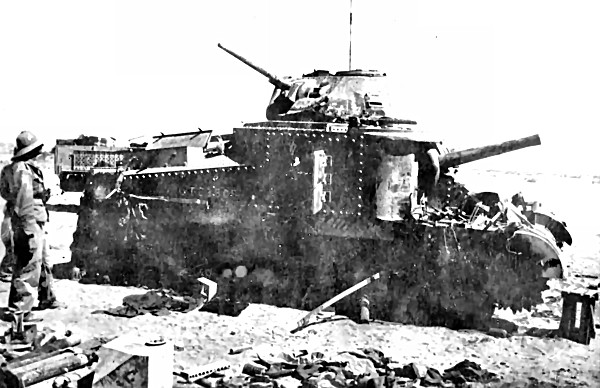
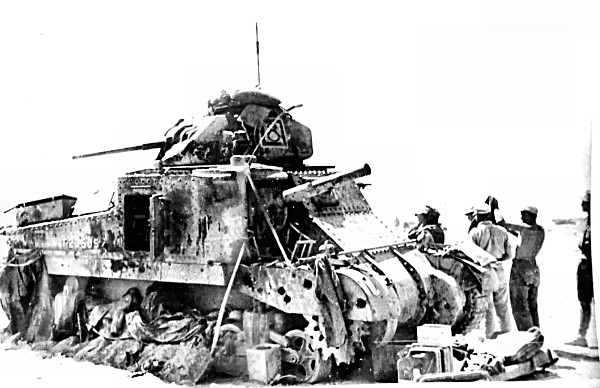
during Operation "Crusader", Nov/Dec 1941
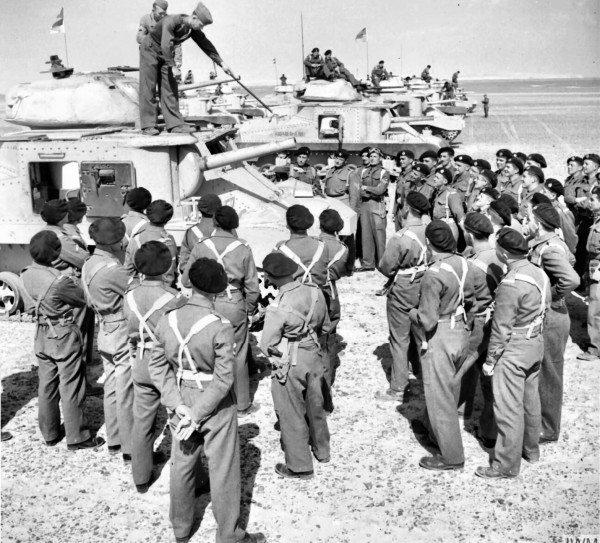
Inside the fortress was 32nd Army Tank Brigade, incorporating 1st RTR (armed with Cruisers), 4th RTR and 'D' Sqn. 7th RTR, both armed with Matildas.
Supporting the infantry of XIII Corps in their drive on the right flank of the relief operation were the three regiments of 1st Army Tank Brigade, 8th RTR with Valentines, and 42nd and 44thRTR with Matildas.
[Source : Bryan Perett, "British Tanks in N.Africa 1940-42", Osprey Vanguard 23]
The Omars were captured by 4th Indian Division and the two Matilda regiments, in spite of the presence of '88's at both locations, and Capuzzo was taken by 2nd New Zealand Division with 8th RTR in support.
[Source : Bryan Perett, "British Tanks in N.Africa 1940-42", Osprey Vanguard 23]
[all names of 8th RTR starting with an "H", the 8th letter in alphabet...]
The Axis garrison of Halfaya Pass, completely isolated, held out until 17 January.
[Source : Bryan Perett, "British Tanks in N.Africa 1940-42", Osprey Vanguard 23]
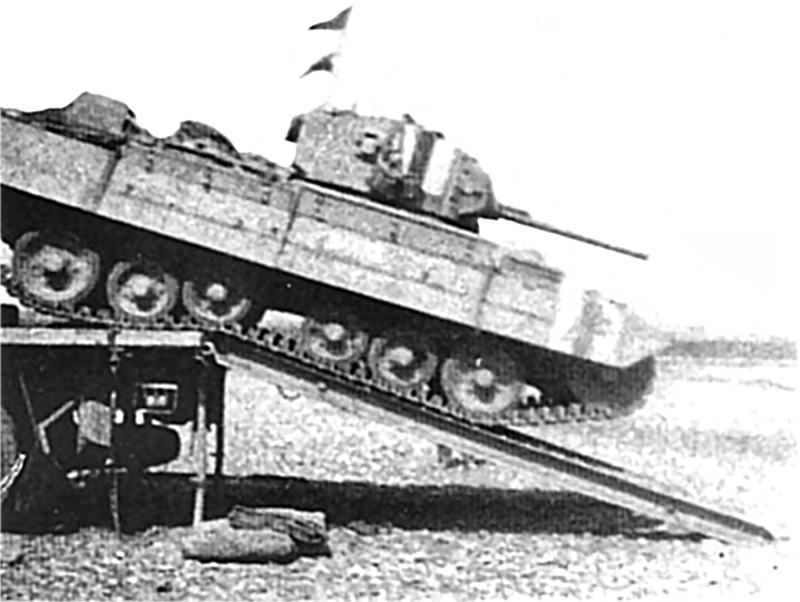
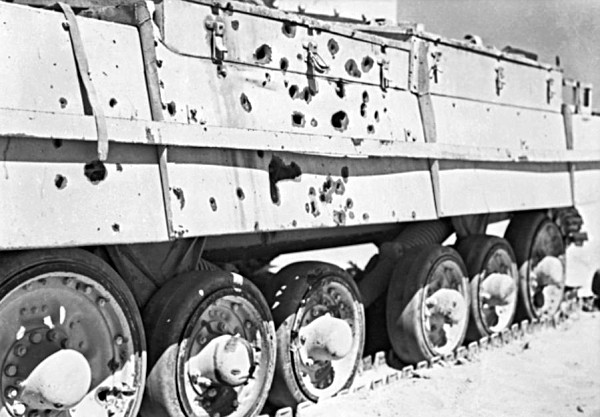
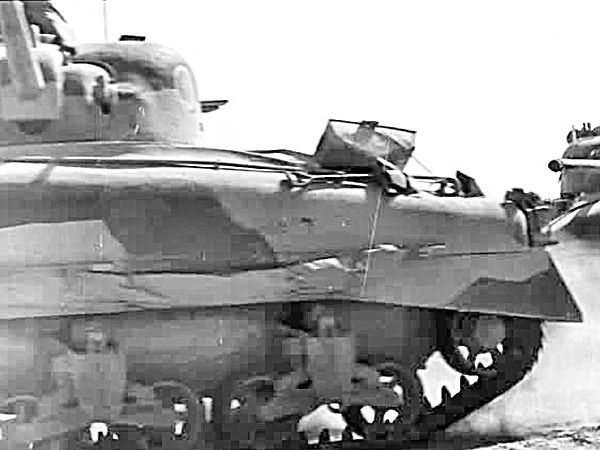
[sorry for the bad photo quality]
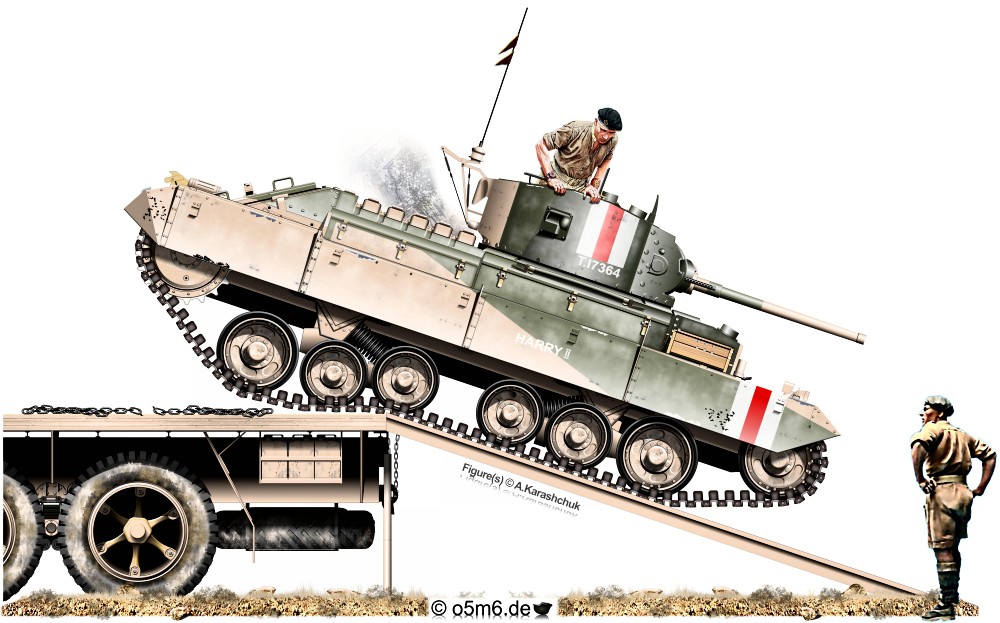
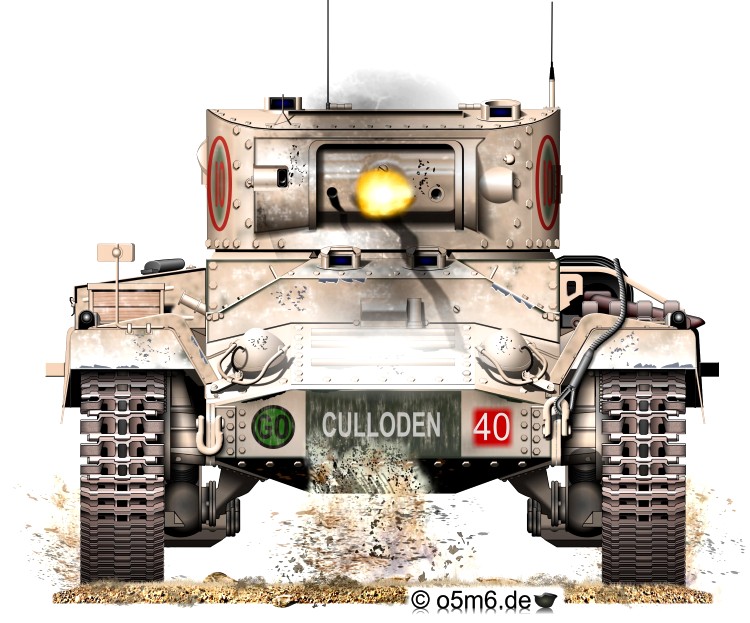
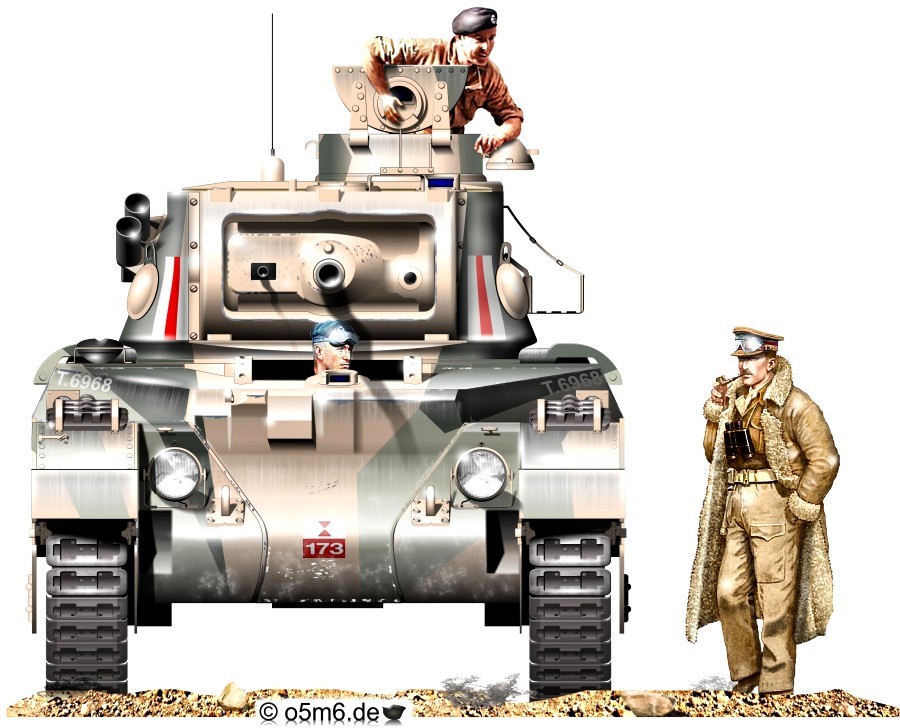
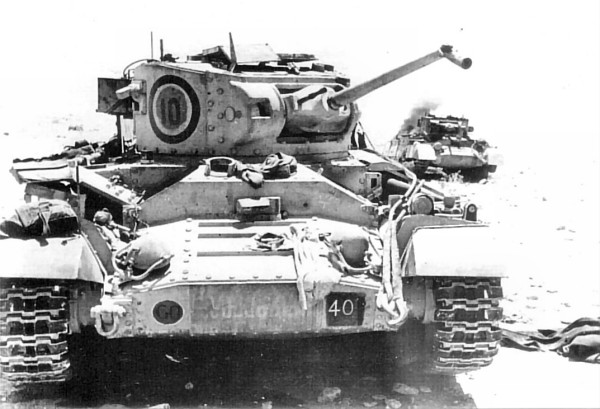
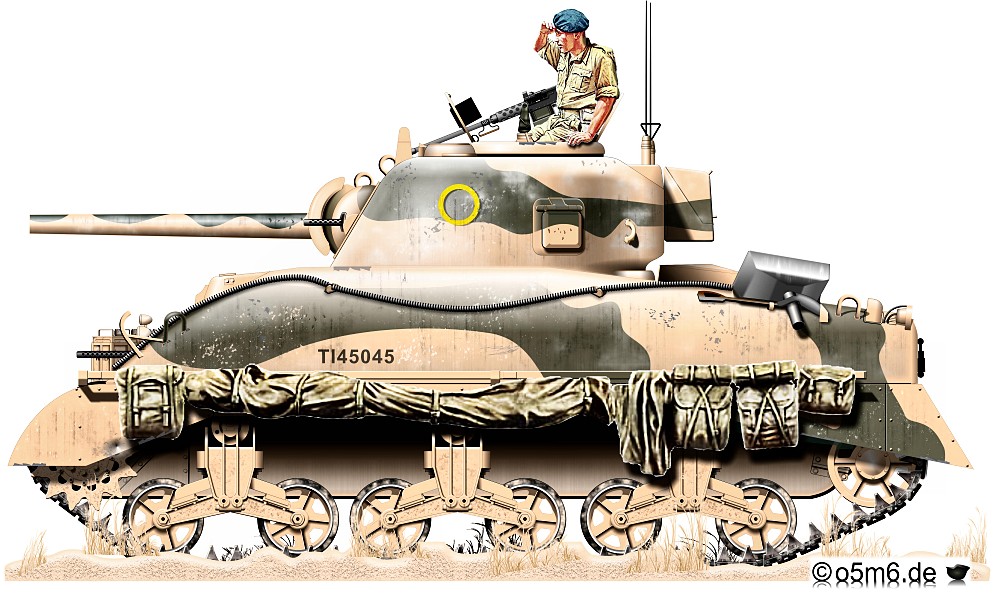
Valentine IV "CULLODEN" of 10 Tp./C Squ., 40th RTR,
23rd Armd.Brig., 8st Armd Div., Ruweisat Ridge, July 22, 1942
On the night of 21/22 July, the 161st Indian and 6th New Zealand Infantry Brigades launched an offensive against Ruweisat Ridge and El Mireyr, which ended quickly and successfully.
On the morning of July 22, after a fierce battle, the New Zealanders reached the El Mireyr depression, and the Indians broke into Deir el-Shein.
However, as had happened more than once, the British tanks did not support their infantry in a timely manner. As a result of the counterattack of the German 15.Pz.Div., the New Zealanders lost several hundred prisoners.
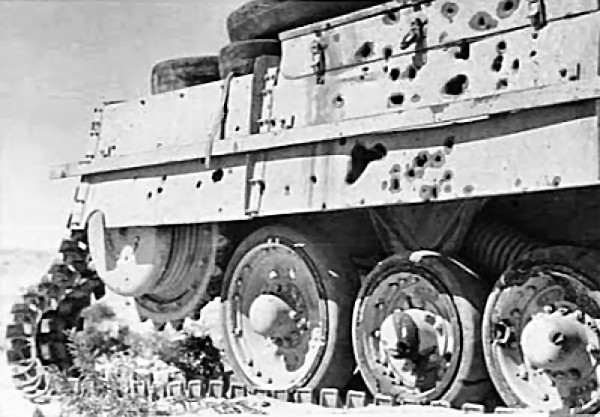
Then the Valentines of 40th and 46th RTR moved forward. They went under continuous fire from anti-tank guns, and then hit a minefield. As a result, the 23rd Armoured Brigade was defeated by the approaching German 15.Pz.Div., and the New Zealand and Indian infantry were forced to withdraw.
Thus, the British offensive in the center of the position at El Alamein on July 22 ended in disaster: in one day they lost more than 100 tanks and about 1,400 men as prisoners.
[Source : Bryan Perett, "British Tanks in N.Africa 1940-42", Osprey Vanguard 23]
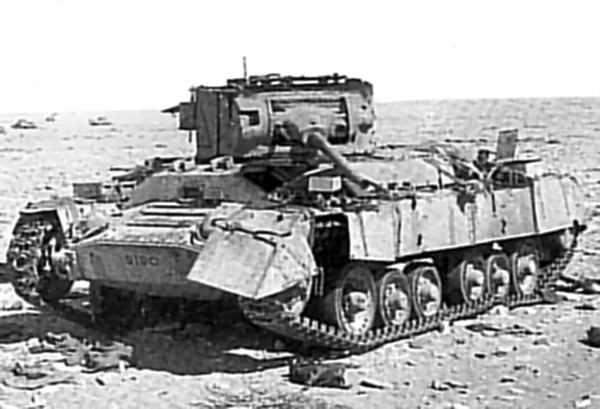
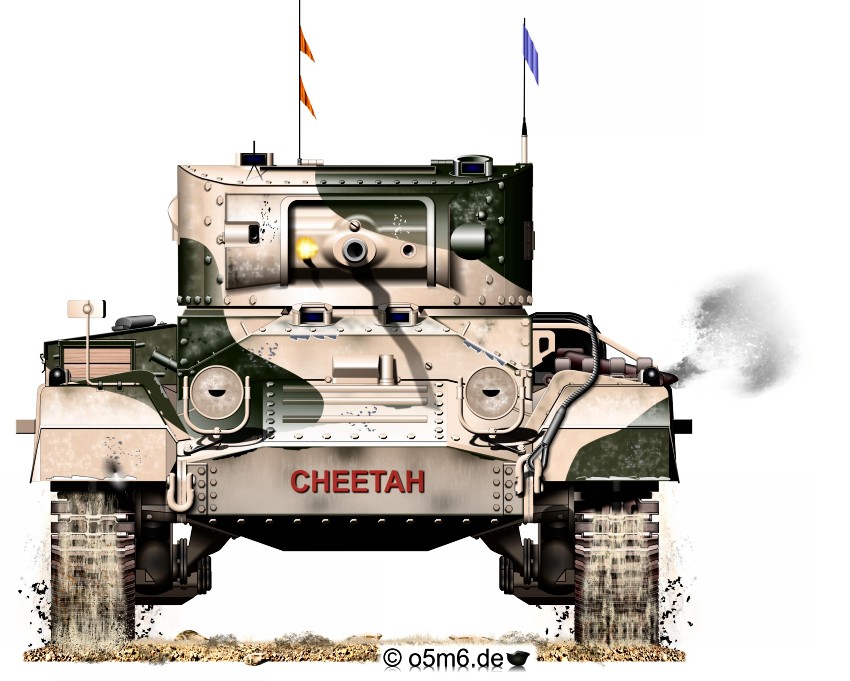
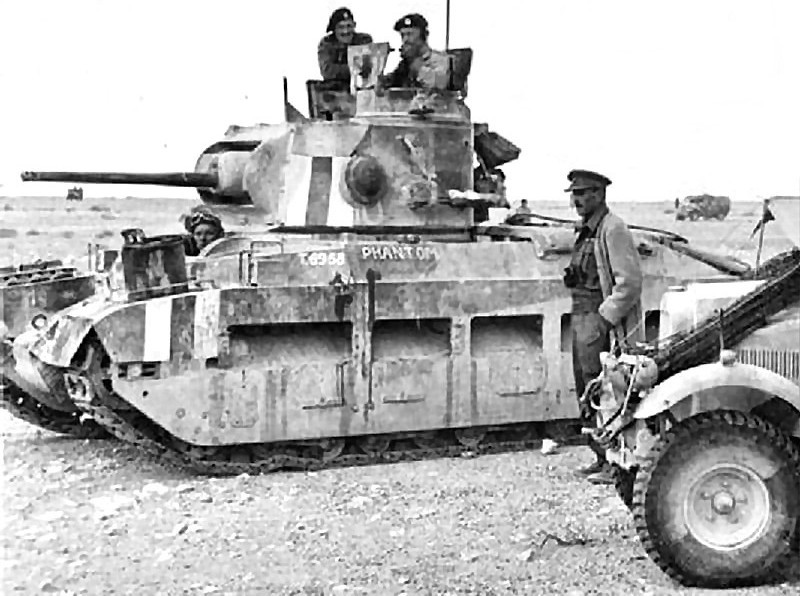
Valentine II "CHEETAH" of 40th RTR at El Alamein, Oct 1942
by then attached to the 9th Australian Division
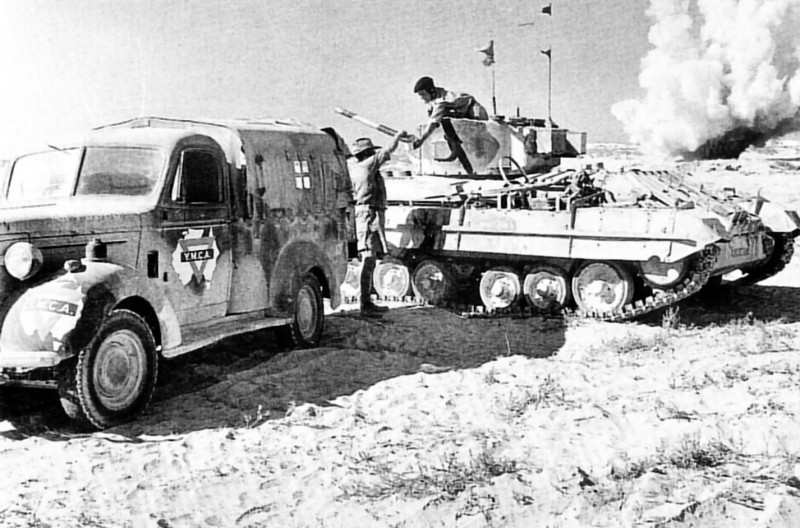
denying nearby explosions with their 1-ton Chevrolet 1300 GS...
with sunshield truck camo, Gazala front, late May 1942


The unit participated in one more action, the major tank battle of Tel el Aqqaqir on 3rd of November, to support the 2nd Armoured Brigade Shermans. After this action, tanks returned to Alexandria, and the unit was disbanded.
Sand shields were fitted to tanks at workshops in Egypt, starting in January 1942, and the US plants began adding these in the factory.
Other changes were authorized in January 1942, including improved exterior stowage and a cloth mantlet cover for the 75mm M2 gun to reduce the intrusion of sand.
Later in the month, workshops began plugging up the fixed-hull machine-gun ports, as this armament was judged to be useless, and the 75mm ammunition stowage was raised to 80 rounds and put in armoured bins.
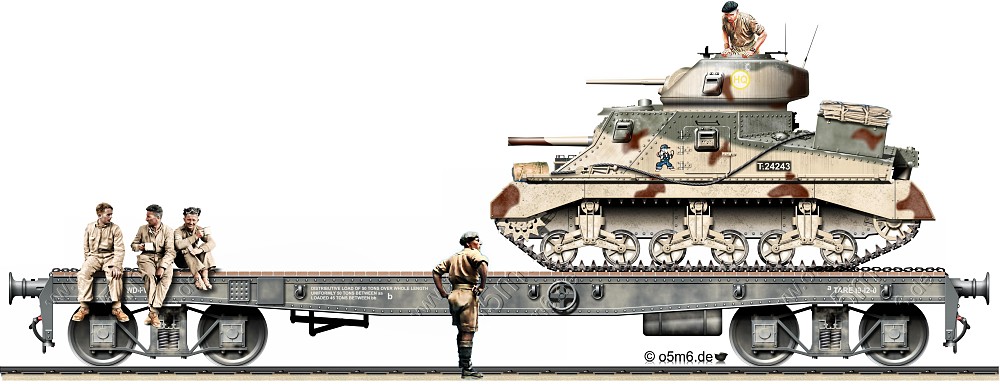
loaded on British warflat departing to the Gazala front, March 27, 1942
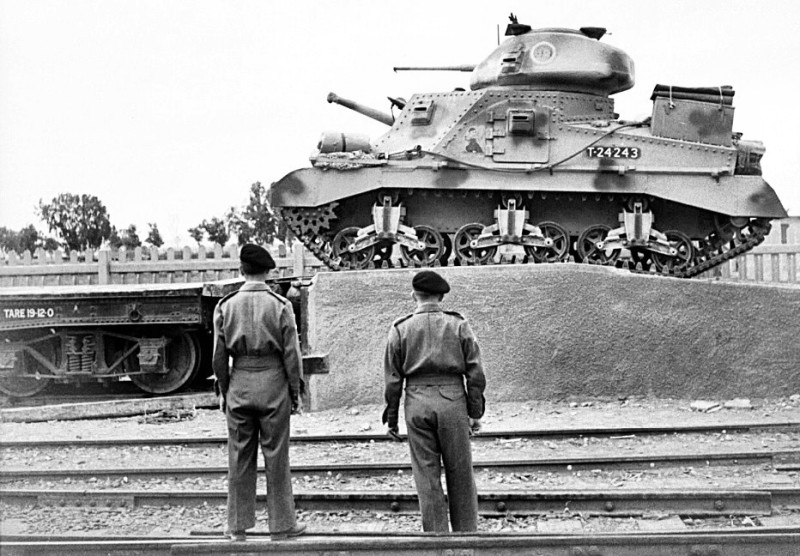
with sunshield truck camo, Gazala front, late May 1942
This was the plan followed in the 4th Armoured Brigade.
The 3rd RTR along with the 5th RTR and the 8th Hussars made up the tank elements of the 4th Armoured Brigade in the 7th Armoured Division, the famous “Desert Rats”.
Equipment tables dated 15 March 1942 allotted 20 Stuarts and 24 Grants to each regiment.
However, because of shortages the 3rd RTR commanded by Lieutenant Colonel G.P.B. Roberts, had only 16 Stuarts and 19 Grants available on the morning of 27 May 1942.
Unknown to them, General Erwin Rommel had launched his operation “Venezia” that afternoon. Powerful Axis forces consisting of the Italian Ariete Division, the German 15th and 21st Pz.Div., and the 90th Light Division swept southeast around Bir Hacheim.
The Italians moved to attack the Free French defending Bir Hacheim, but the German force moved northeast to cut behind the British positions.
The brigade was finally ordered to rendezvous at 8:15 AM and the 3rd RTR, which was to lead, moved out at 7:30 AM. With the light squadron of Stuarts about 2000 yards in front, the 19 Grants moved in line with B Squadron commanded by Major George Witheridge on the right and C Squadron under Major Cyril Joly on the left. Colonel “Pip” Roberts was in the center, also in a Grant.
Ordering A Squadron’s Stuarts to protect the flank, Colonel Roberts moved the Grants into a battle line along a small ridge. When the range closed to about a 1000 yards, the regiment’s 19 tanks opened fire with a devastating effect. As Rommels own notes show, the Grant’s 75mm gun was a drastic shock to the Germans. For the first time, British tanks could engage the enemy beyond the effective range of the 5cm gun of the Panzer III or the short barreled 7.5cm weapon in the Panzer IV. None of the new Panzer IVs with the long barreled KwK 40 were available for this action.
The C Squadron Leader’s tank had been knocked out and he was slightly wounded. Major Witheridge, leading B Squadron, was on his fourth tank after three Grants had been shot out from under him.
Out of the original 19 Grants, seven, including Colonel Roberts, arrived at the rendezvous point to replenish their fuel and ammunition. Three other tanks had been sent on to the rear since their guns had been damaged rendering them useless for combat. Fighting continued in the afternoon and by the end of the day the 3rd RTR had been reduced to five Grants and eight Stuarts.
The regiment claimed the destruction of 30 enemy tanks, but they had been almost wiped out with only two Grants surviving the day.
The 5th RTR was much more fortunate than its sister regiments ending the day with only light casualties.
A staff officer who inspected the several knocked-out tanks from the 22nd Armoured Brigade afterwards commented that "it is apparent that the Grant tank can take a great deal of punishment." One Grant had been hit no fewer than 31 times, with the only damage being caused by two 50mm hits on the front visors and a rear hit by a 37mm gun. Another had been hit 12 times with no penetrations.
Larger-caliber artillery was particularly lethal, with two of the inspected tanks penetrated and burnt out by 105mm howitzer hits (!) and another by an 88mm round that set off an internal fire.
8th Hussars, 4th Armoured Brigade, with the usual German battlefield tourism...
Imperial War Museum, London
Norm E. Harms,Steve Clayton "British Armour in Action - Armor No. 9", Squadron/Signal Publ., 1974
Ken Jones,Peter Chamberlain, "Lee & Grant", Classic AFV #2, Airfix Prod.Ltd., 1977
Brian Perret, "British Tanks in N.Africa 1940-42", Osprey Vanguard 23, Osprey Publ., 1981
Jim Mesko "M3 Lee/Grant - Armor No. 33", Squadron/Signal Publ., 1995
Steve Zaloga, "M3 Lee/Grant Medium Tank 1941-45", New Vanguard No.113, Osprey Publ., 2005
R.P. Hunnicut, "SHERMAN - A History of the American Medium Tank", Presidio Press, 2015
David Fletcher,Steve Zaloga, "British Battle Tanks - American Made", Osprey Publ., 2018
Joe DeMarco,Leife Hulbert,Peter Brown, "British M3, M3A2, M3A3 and M3A5 Grants" - PERFECT !!!
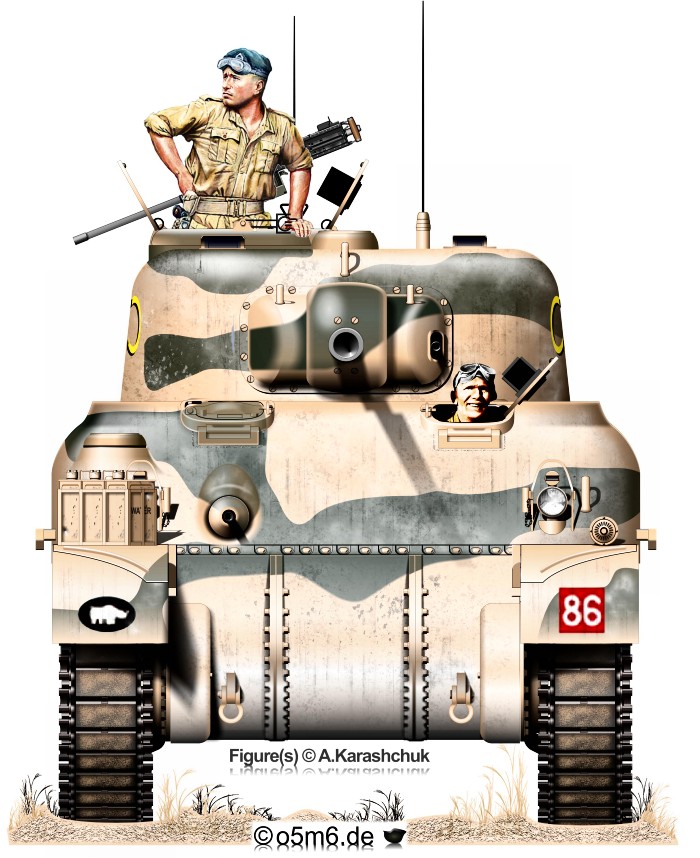
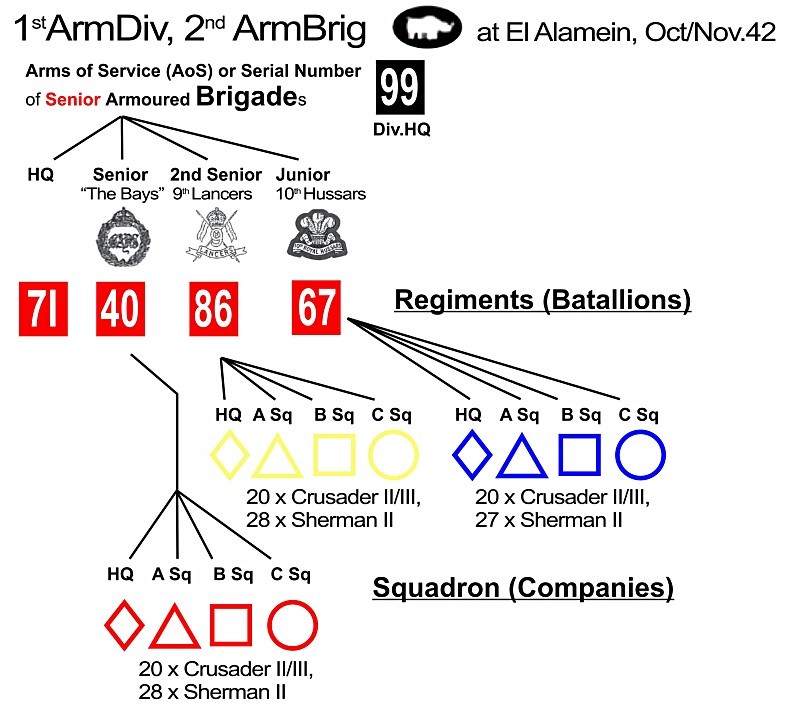
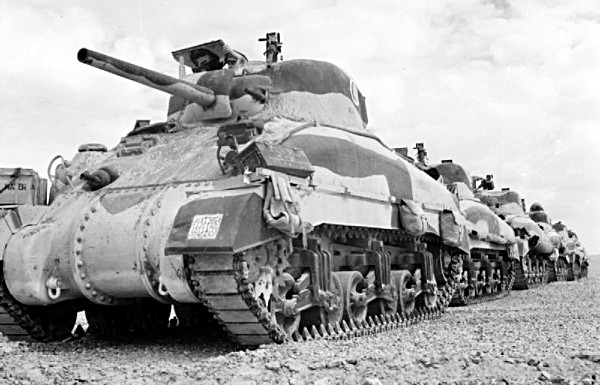
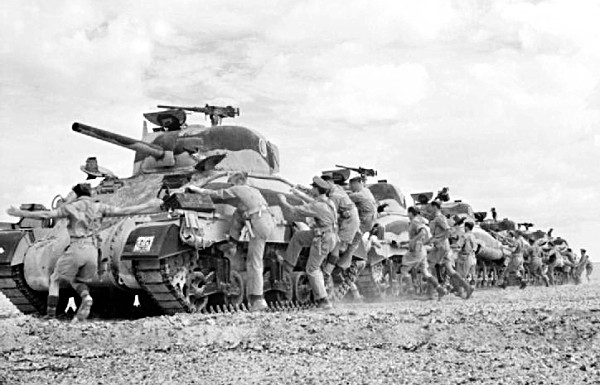
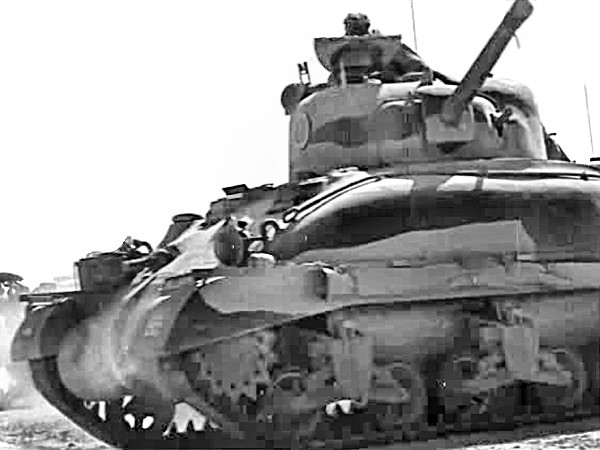
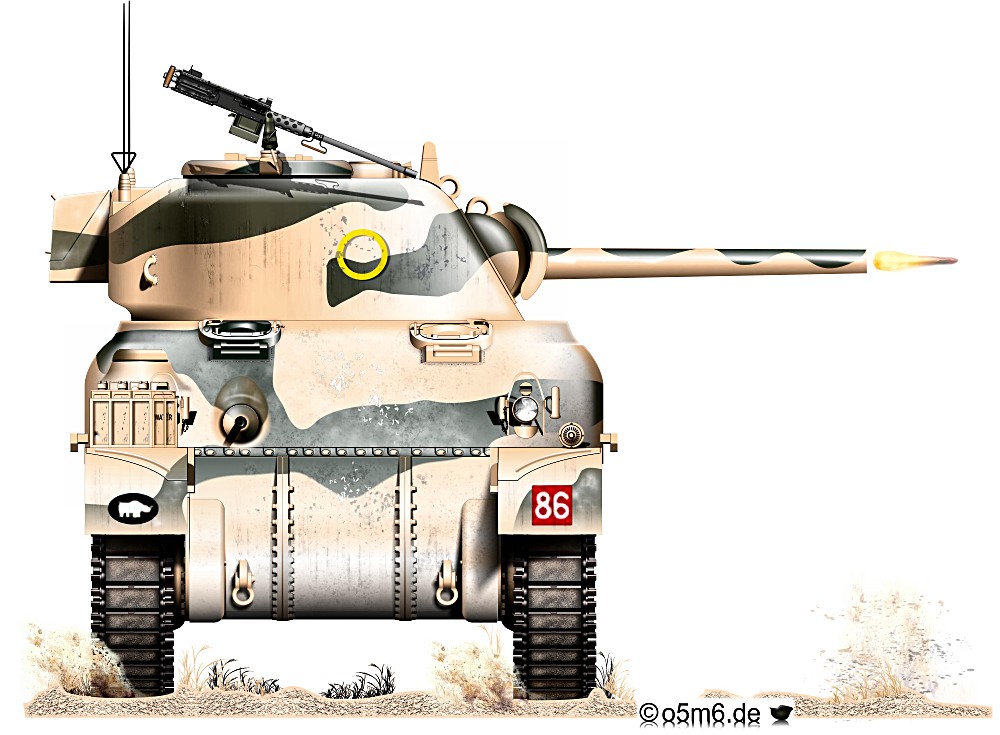
2nd Armoured Brigade, 1st Armoured Division, El Alamein, October 1942
While the infantry divisions were to move forward, secure the minefields ("Devil’s Garden") and prepare lanes for the armoured units to break through, the 1st and 10th Armoured divisions would then attack through the corridors created by the engineers to cut off the German supply lines and destroy the panzer reserves.
Montgomery expected a twelve-day battle broken into three stages - “the break-in, the dog-fight and the final breakout”. During the build-up to Operation Lightfoot, the British had been running a number of deceptions to make the Axis unsure of their intentions, and area of any planned attack: Some tanks had been disguised as trucks with canvas and plywood shells, and vice versa.
...
...
By dawn the minefield belts remained unbroken and the Regimental Group, with much of 2nd Armoured Brigade, found itself exposed, hemmed in by minefields and unable to manoeuvre as heavy shelling began. Vehicles started to burn as enemy guns on Meteiriya Ridge, 3000 yards to the front, successfully engaged them, a situation endured until midday when the minefield was breached. However, within a few hundred yards of the Ridge, yet another minefield was found with no apparent way around. The Brigadier ordered "to drive straight through whatever the casualties", so, after a quick check back to make certain that he really meant it, C Squadron drove into the mines.
...
...
It proved a false hope to break through, as attempts to advance over the following days were baulked by further defences and counter-attacks that took a significant toll across the Brigade, with neither armour nor infantry able to make significant progress.
The situation was the same across the front although the assault had tied up the enemy’s tactical reserve, taken a large bite out of his position and used up much of his fuel, though at a high cost to the Allied infantry which was by now exhausted. A pause was now needed to withdraw the armour, reset and then attempt to push through again.
After four days spent in close contact, the 9th were taken out of the firing line to refit during the last three days of October.
...
...
9th Armoured Brigade were ordered to punch through the anti-tank screen – prepared to take 100% casualties if necessary – with 2nd Armoured Brigade ready to pass through and bring 21st Pz.Div. to battle.
The 9th Armoured Brigade, at an appalling cost (the 3rd Hussars lost all but four of its fifty-two tanks), had succeeded in punching some of the way through the German anti-tank shield as far as the Rahman track in order to allow the 1st Armoured Division to begin the break-out.
An infantry troop-leader described the situation as they moved forward:
"...As dawn broke, in the haze of dust, shapes arose. All of them were
...


...
In the same area, the 9th Lancers had led the 2nd Armoured Brigade advance on to the plateau of Aqqaqir where they too came across the wreckage of the 9th Armoured Brigade as both regiments now found themselves engaged by the enemy’s still potent anti-tank guns and armour. For the 9th the fight that ensued was "about the worst we had ever had".
Facing a line of 88s, 105s and armour which engaged them from three sides, over six concerted counter-attacks were repulsed, with the 9th Lancers accounting for thirty-one enemy tanks in a fight that was by no means one-sided. Two of C Squadron’s Shermans were burnt out, one cruiser destroyed and five other Shermans knocked out.
Although the breakthrough had not occurred, the day’s fighting, the hammering of the panzers had succeeded in bringing Rommel’s armour to battle and reducing it significantly, causing losses the Germans could ill afford.
...
...
4th November continued with much the same slugging match though signs were coming, as the German infantry began to lose their nerve and was finally abandoning its positions and heading west.
The breakout by the 1st Armoured Division was led by the 9th Lancers as news began to arrive of large numbers of prisoners being taken to the south.
In the brief lull men who were exhausted after the action of the last few days and without the sound of shells to wake them, slept where they stopped.
On the following morning "the first thing we saw was a cold and untidy German private standing over the Colonel as he slept and saying: 'I’ve been trying to find someone to surrender to for three hours'. To which a sleepy voice replied: SHUT UP AND SIT DOWN !
- For the A15 Crusader III at El Alamein look here
- Peter Brown, "El Alamein Sherman - The History" ...of the 2nd Armoured Brigade - full credit to: Modelling Magazine Vol.32 No.10 2002 - large 23 MB pdf, yet... EXCELLENT !!
- IWM's film "The Second Battle of El Alamein - Turning point in North Africa" - DON'T MISS !!
No publication in any form without the author's written permission.
Last Updated: Apr 18, 2023